Table of Contents
These Minecraft floor designs use a simple idea: combine two to four wood colors in a repeating pattern instead of filling the whole room with one plank. The four designs shown here range from an easy checker grid to a more detailed nested wood pattern, and each one can be adjusted to fit a small house or a much larger build.
- Designs: 4 wood floor patterns
- Difficulty: Easy to medium
- Good blocks: Birch, oak, spruce, and dark oak
- Good starting size: 5×5 blocks or larger
- Works for: Houses, cabins, halls, bedrooms, and bases
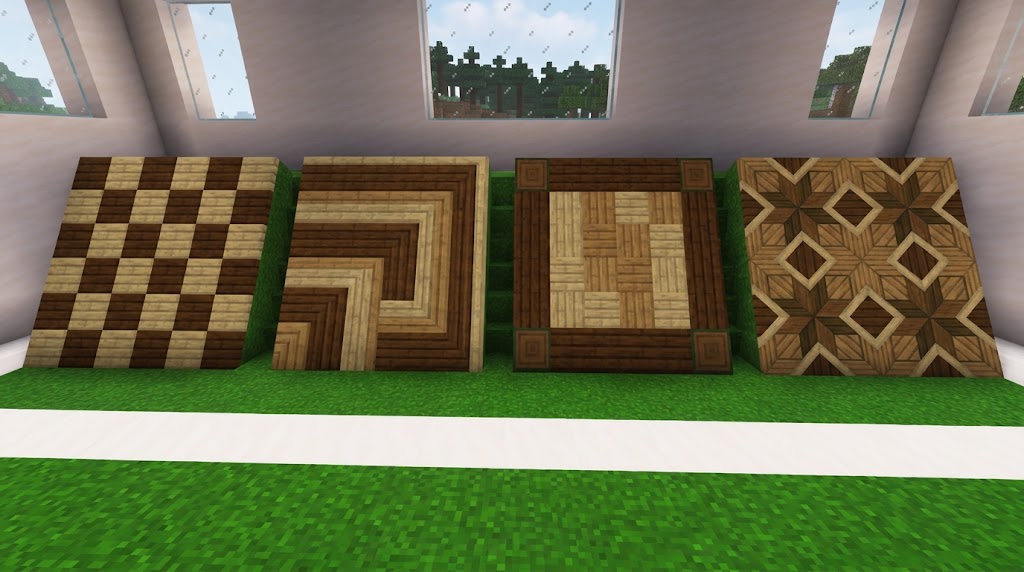
The 4 Minecraft Floor Designs in the Image
The image uses several shades of wood to create four different geometric effects. You do not need to match the exact blocks in the original image. The same layouts work with any light, medium, and dark wood palette.
1. Four-Tone Checker Grid
The first floor is built as a square grid with several wood colors mixed across it. Instead of alternating only two colors, it uses light, medium, and dark shades.
A simple palette is birch for the lightest blocks, oak for warm gold, spruce for medium brown, and dark oak for the darkest squares.
This pattern is easy to expand because every block acts as one tile. It works well in small rooms where a larger design would not have enough space to repeat.
Tip: Avoid putting too many dark blocks next to each other. Spread the darkest color around the grid so one side of the floor does not look heavier than the other.
2. Nested Corner Wood Pattern
The second design uses bands of color that turn around a corner and move toward the center. It creates a spiral-like effect without needing diagonal blocks.
Start with the darkest wood around the outside. Place a lighter L-shaped band inside it, then repeat the shape with another shade.
Odd-sized floors such as 5×5, 7×7, or 9×9 make this layout easier because you can finish with a clear center block or center section.
3. Light Wood Tile Pattern
The third design keeps most of the floor light and adds small repeated accent squares. This gives the room texture without using strong contrast everywhere.
Use oak or birch planks for the main floor. Add a darker wood block at regular intervals to form a simple grid.
You can also place logs vertically so the top face shows through the floor. The different texture creates a small decorative tile without adding another color.
4. Mixed Wood Mosaic
The fourth floor looks more random, but it still works because the same small group of wood colors repeats across the square.
Choose three or four woods and place them in a loose grid. Keep one light or medium wood as the main color, then use the darkest blocks as accents.
This pattern is useful when you want a floor that feels less formal than a checkerboard.
Best Wood Blocks for These Patterns
| Wood | Visual Role | Good Use |
|---|---|---|
| Birch | Very light | Highlights and bright rooms |
| Oak | Warm light brown | Main floor color |
| Spruce | Medium brown | Borders and contrast |
| Dark Oak | Dark brown | Frames and small accents |
You do not need all four wood types. A two-color floor can look cleaner in a small build. Three or four tones work better when the room is large enough for the pattern to repeat.
How to Build a Minecraft Wood Floor Pattern
Measure the room.
Count the floor width and length before placing the decorative blocks.
Choose two to four wood tones.
Pick one main color first, then add lighter or darker blocks for contrast.
Build a small test square.
Try the pattern in a 5×5 area before filling the whole room. It is much easier to change five rows than a finished hall.
Mark the center.
A center block helps keep checker, framed, and nested patterns balanced.
Build the border first when needed.
A one-block border can hide an uneven edge when the room size does not match the repeating pattern.
Repeat the design in sections.
Finish one small module and copy it across the room instead of placing random blocks one at a time.
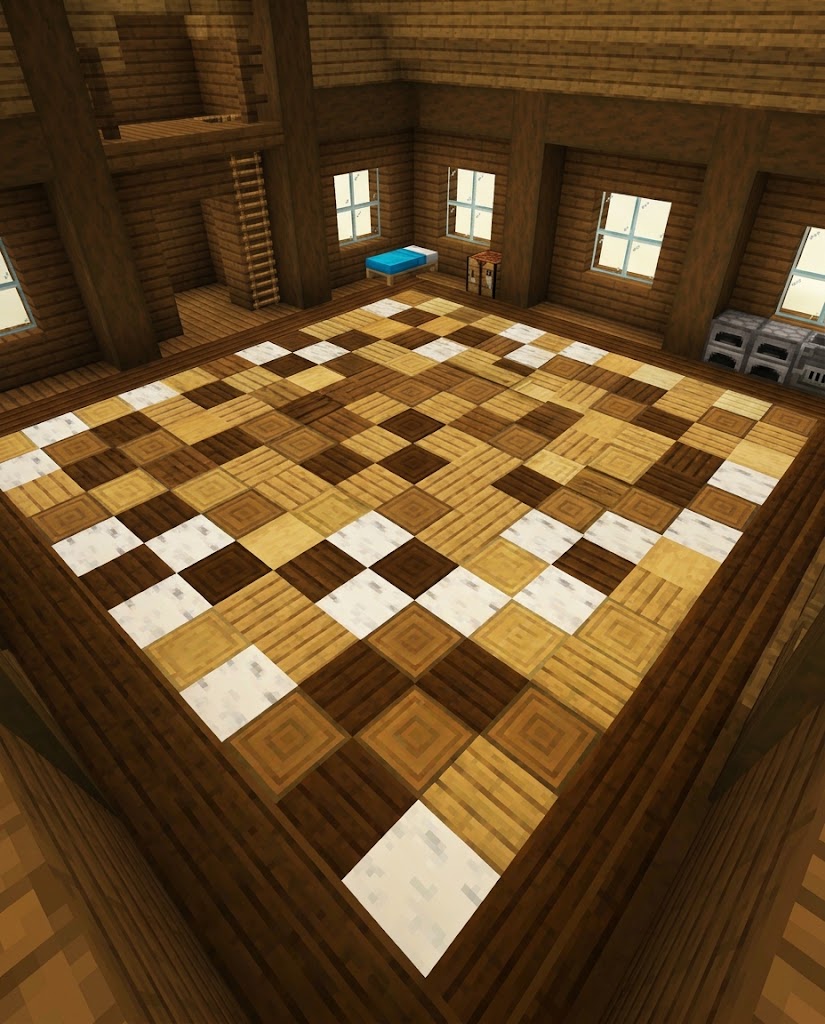
How to Scale the Pattern to a Bigger Room
Start with the size of the repeating section rather than the full room. If your basic design is 5×5 blocks, repeat that square across the larger floor.
If the room does not divide evenly, use a border around the outside. For example, a dark oak frame can absorb the extra space while keeping the center pattern symmetrical.
For any rectangular room, the total number of floor blocks is simply the room width multiplied by its length. A 9×12 room needs 108 floor blocks before accounting for openings such as stairs or trapdoors.
Which Design Should You Choose?
| Build | Pattern | Why |
|---|---|---|
| Small starter house | Two-tone checker | Simple and easy to repeat |
| Cozy cabin | Light tile grid | Keeps the room warm and simple |
| Large hall | Nested corner pattern | The larger shape has room to show |
| Creative base | Mixed mosaic | Easy to customize with your available blocks |
Easy Survival-Friendly Version
If you are building in Survival mode, start with only two wood types. Oak and spruce create a clear difference without requiring many different biomes.
Make most of the floor from the easier wood to collect. Save the darker or rarer material for the border, center, or every second tile.
This gives you the patterned look without turning the floor into a large resource project.
Common Minecraft Floor Design Mistakes
- Too many colors: Five or six wood tones can make a small room look noisy.
- No main color: Let one wood cover more of the floor and use the others as accents.
- Ignoring room size: A detailed pattern may disappear under furniture in a tiny room.
- Starting randomly: Marking the center or border first makes geometric patterns easier to control.
- Strong walls and strong floors together: If the floor is busy, simpler walls make the pattern easier to see.
Frequently Asked Questions
What is the easiest Minecraft floor design?
A two-color checker pattern is one of the easiest options. Alternate two wood types across the floor and repeat the same sequence on each row.
Do I need four different wood types?
No. The designs can be simplified to two or three colors. The pattern matters more than matching the exact blocks shown in the image.
Can I use stone instead of wood?
Yes. The same layouts can be rebuilt with stone bricks, deepslate, polished andesite, terracotta, or other blocks with enough visual contrast.
How do I make the floor look less random?
Choose one dominant block and repeat the accent blocks at a fixed distance. Borders and center points also help make mixed-block floors look intentional.
Will these designs work in Java and Bedrock?
The basic designs only rely on normal block placement, so the layout idea works in both editions. Exact textures can look different depending on the game version or resource pack.
Source
For official information about Minecraft wood and plank blocks, see Minecraft’s official Planks guide.