Table of Contents
- How This 3-Roll Crochet Toilet Paper Holder Is Built
- Materials
- Gauge and Finished Size
- Crochet Abbreviations
- Part 1: Crochet the Roll Sleeves — Make 3
- Part 2: Add the Cream Edging
- Part 3: Crochet the Daisy Appliqués — Make 3
- Part 4: Crochet the Back Strip and Hanging Loop
- Part 5: Assemble the Three Sleeves
- Why Separate Sleeves Work Better
- How to Resize the Pattern
- Color Ideas
- Common Problems
- Care Instructions
- Frequently Asked Questions
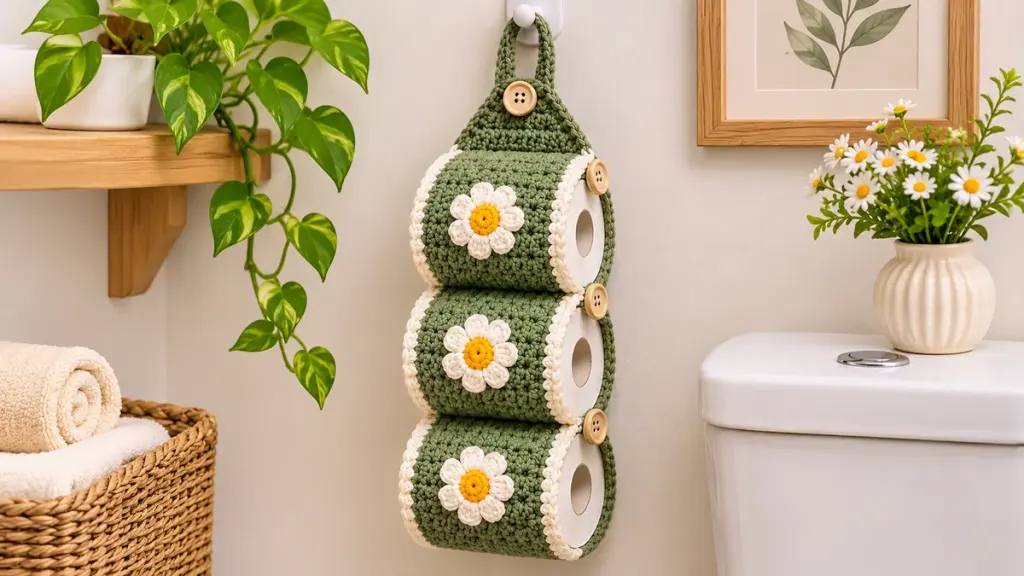
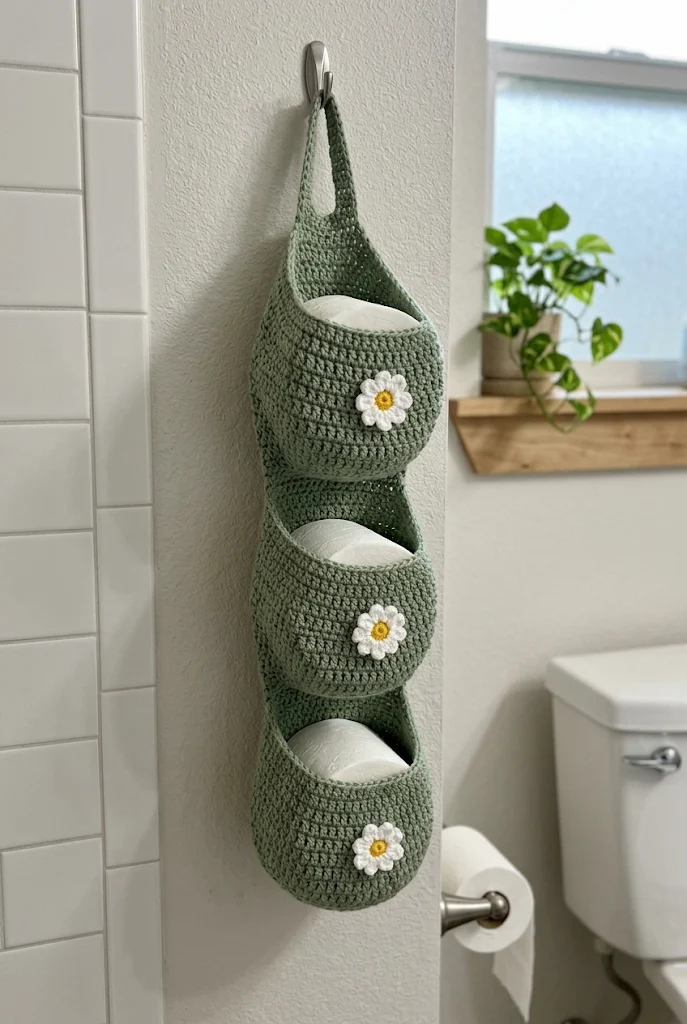
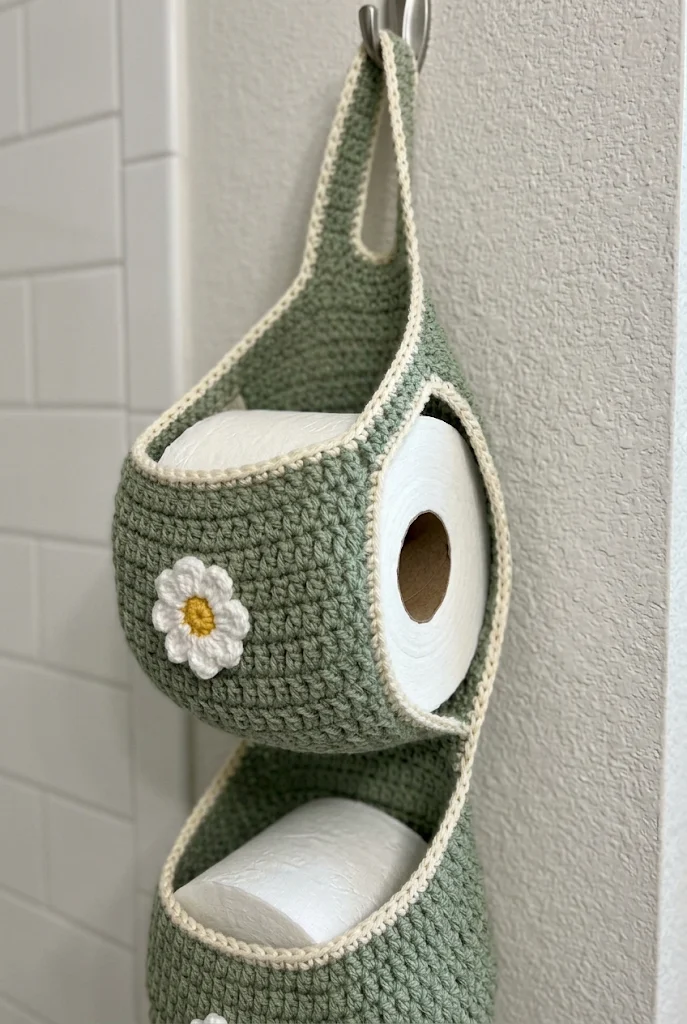
This crochet toilet paper holder pattern stores three spare rolls in soft sage-green sleeves finished with cream edging and simple daisy appliqués. Each roll sits inside its own crochet tube, so the organizer hangs neatly while keeping the rolls easy to remove from either side.
- Skill level: Confident beginner
- Terminology: US crochet terms
- Capacity: 3 standard toilet paper rolls
- Construction: 3 sleeves + long back strip + hanging loop
- Main stitches: Chain, single crochet, double crochet, slip stitch
- Style: Sage green, cream trim, white daisies
How This 3-Roll Crochet Toilet Paper Holder Is Built
The finished holder looks detailed, but the construction is simple. You make three matching rectangles, seam each rectangle into a tube, and attach the tubes vertically to one long crochet back strip.
Each toilet paper roll slides through the open side of its own sleeve. This is why the cardboard center remains visible from the side in the finished organizer.
Cream edging frames each opening. A small white daisy is sewn to the front of every sleeve, while the upper part of the back strip narrows into the hanging loop.
Fit first: Toilet paper rolls vary by brand. Crochet the first sleeve, wrap it around one full roll, and adjust the stitch count before making the other two.
Materials
- Main yarn: #4 medium/worsted cotton or cotton-blend yarn in sage green, about 300–350 yd (275–320 m)
- Edging and petals: Cream or white yarn, about 60–80 yd (55–73 m)
- Daisy centers: Yellow yarn, about 15–20 yd (14–18 m)
- Hook: 5.0 mm (US H-8), or size needed for gauge
- Button: About 1 in (25 mm)
- Yarn needle
- Stitch markers
- Scissors
- Measuring tape
- 3 toilet paper rolls for fit checks
Gauge and Finished Size
| Part | Target Size | Purpose |
|---|---|---|
| Gauge | 14 sc × 15 rows = 4 in (10 cm) | Controls sleeve fit |
| Sleeve rectangle | About 14½ × 5 in (37 × 13 cm) | Wraps around one roll |
| Back strip | About 3⅛ in (8 cm) wide | Supports all 3 sleeves |
| Finished organizer | About 22–23 in (56–58 cm) | Includes hanging section |
These measurements are a useful starting point, but your actual toilet paper roll is the final fitting guide.
Crochet Abbreviations
| Abbreviation | US Term |
|---|---|
| ch | chain |
| sc | single crochet |
| sc2tog | single crochet two together |
| dc | double crochet |
| sl st | slip stitch |
| st / sts | stitch / stitches |
| MR | magic ring |
| FO | fasten off |
Pattern note: Turning chains do not count as stitches unless the pattern says otherwise.
Part 1: Crochet the Roll Sleeves — Make 3
Work all three sleeves in sage yarn. Each sleeve is crocheted flat first and then joined into a tube.
Foundation: Ch 52.
Row 1: Sc in the second ch from hook and in each ch across. Ch 1, turn. 51 sts.
Rows 2–19: Sc in each st across. Ch 1 and turn after Rows 2–18. 51 sts each row.
After Row 19, FO and leave a long tail for seaming.
Check the Fit Before Seaming
- Place one full toilet paper roll on the rectangle.
- Wrap the crochet around the roll.
- Bring the short ends together at the back.
- The fabric should touch the roll without squeezing it.
- If the fit is right, remove the roll and seam the short ends together.
Stitch-count check: Each sleeve remains 51 stitches around. Joining the short edges forms the tube without changing the stitch count.
Part 2: Add the Cream Edging
The cream edging creates the clean border seen around each side opening.
Round 1: Join cream yarn at the sleeve seam. Ch 1. Sc in each of the 51 sts around. Join with a sl st to the first sc. 51 sts.
Round 2: Sl st loosely in each stitch around. Join and FO.
Repeat on the opposite opening, then repeat the same edging on the other two sleeves.
Keep the edging loose: Tight slip stitches can shrink the sleeve opening and make a fresh toilet paper roll difficult to insert.
Part 3: Crochet the Daisy Appliqués — Make 3
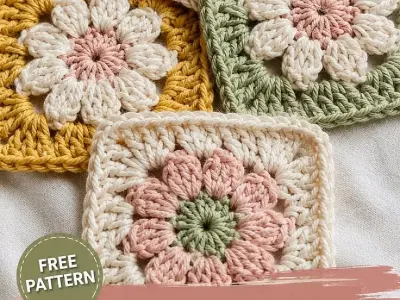
The small daisies create the cottage-style look shown in the finished holder.
Round 1 — Yellow: Make an MR. Work 8 sc into the ring. Pull closed and join with a sl st. 8 sts.
Round 2 — White: Join white yarn. In each stitch work: sl st, ch 2, 2 dc, ch 2, sl st in the same stitch.
Repeat in all 8 stitches to create 8 petals. FO and leave a tail for sewing.
Sew one daisy to the center front of each sage sleeve. Keep the flower directly opposite the vertical seam so the seam remains hidden at the back.
Part 4: Crochet the Back Strip and Hanging Loop
The back strip holds the three sleeves together and carries the weight of the finished organizer.
Foundation: Ch 12.
Row 1: Sc in second ch from hook and across. Ch 1, turn. 11 sts.
Rows 2–64: Sc across. Ch 1, turn. 11 sts.
Row 65: Sc2tog, sc in next 7 sts, sc2tog. Ch 1, turn. 9 sts.
Row 66: Sc2tog, sc in next 5 sts, sc2tog. Ch 1, turn. 7 sts.
Rows 67–82: Sc across. Ch 1, turn. 7 sts.
Row 83 — Buttonhole: Sc in next 2 sts, ch 3, skip next 3 sts, sc in final 2 sts. Ch 1, turn.
Row 84: Sc in first 2 sts, work 3 sc in the ch-3 space, sc in final 2 sts. Ch 1, turn. 7 sts.
Rows 85–88: Sc across. 7 sts.
FO and weave in ends.
Sew the button securely near the start of the narrowed section. Fold the strap over a wall hook and check that the buttonhole closes without pulling hard.
Part 5: Assemble the Three Sleeves
Place one full roll inside each sleeve before assembly. The rolls help the sleeves hold their finished shape while you position them.
- Position the bottom sleeve. Center its back seam over the lower section of the back strip.
- Sew through the sleeve seam. Attach it firmly from top to bottom.
- Position the middle sleeve. Leave a small gap above the bottom sleeve.
- Sew the middle sleeve securely. Keep its seam centered on the strip.
- Attach the top sleeve. Match the spacing used below.
- Check alignment. All three daisies should face directly forward.
- Add hidden stabilizing stitches. Join neighboring sleeves at their touching points if the organizer swings too much.
- Load all three rolls. Slide them through the side openings.
- Hang the holder. Secure the buttoned strap over a sturdy hook.
Why Separate Sleeves Work Better
Each roll has its own support instead of sitting in one long open pocket. This keeps the organizer rounded and makes it easier to remove one roll without disturbing the other two.
The long back strip carries the vertical weight, while the individual tubes control the shape of each roll section.
How to Resize the Pattern
If Your Roll Is Larger
Add 2–4 chains to the sleeve foundation. Crochet the same number of stitches on every row.
If Your Roll Is Smaller
Remove 2–4 foundation chains, then test the rectangle again before seaming.
If Your Roll Is Wider
Add rows to increase the height of the sleeve. At the listed gauge, about four extra rows add roughly 1 inch (2.5 cm).
Best method: Perfect the first sleeve before crocheting the second and third. Once the first sleeve fits your actual roll, copy its stitch and row counts exactly.
Color Ideas
| Main Color | Edging | Daisy |
|---|---|---|
| Sage green | Cream | White + yellow |
| Dusty rose | Ivory | Cream + mustard |
| Soft blue | White | White + yellow |
| Warm beige | Cream | Sage + yellow |
| Charcoal | Natural | Optional |
For a modern bathroom, remove the daisies and use one neutral color throughout. For a softer cottage look, keep the cream trim and floral appliqués.
Common Problems
The Roll Is Too Tight
The sleeve circumference is too small or the edging is too tight. Add a few foundation stitches or redo the final edging more loosely.
The Sleeve Is Too Loose
Remove a few foundation stitches. The fabric should touch the roll without hanging away from it.
The Organizer Twists
Check that every vertical sleeve seam is centered on the back strip. Even a small offset can make the loaded holder lean.
The Back Strip Stretches
Use firm tension and a structured cotton yarn. If necessary, move down 0.5 mm in hook size for the back strip only.
The Daisy Petals Curl
Flatten the flowers gently before sewing. Light blocking can also help the petals sit evenly.
Care Instructions
Remove all toilet paper rolls before cleaning the organizer.
Follow the care label for your yarn. Gentle hand washing is a safe option for many cotton versions because it protects the appliqués, seams, and button.
Reshape the sleeves while damp and dry the holder flat before hanging it again.
Frequently Asked Questions
How many rolls does this crochet toilet paper holder hold?
This version holds three rolls. Each roll sits inside its own horizontal crochet sleeve.
Is this pattern beginner friendly?
It suits a confident beginner who can make chains, single crochet, double crochet, slip stitches, simple decreases, and basic seams.
What yarn works best?
A smooth #4 medium cotton or cotton-blend yarn gives the sleeves good stitch definition and useful structure.
Can I use acrylic yarn?
Yes. If the acrylic feels very soft or stretchy, use a slightly smaller hook so the holder keeps its shape under the weight of three rolls.
Can I make a 2-roll holder?
Yes. Crochet two sleeves instead of three and shorten the wide portion of the back strip before starting the hanging section.
Can I make a 4-roll version?
Yes, but extend the back strip by another sleeve section and use a strong wall hook because the finished holder will be heavier.
Why should I measure my toilet paper roll?
Roll diameter and width vary between brands. Measuring your own roll prevents all three sleeves from ending up too tight or too loose.
Pattern review: Stitch counts have been checked for internal consistency. Because yarn tension and toilet paper roll sizes vary, physically test the first sleeve and the completed hanging structure before publishing the final pattern.
Free CrochetEco PDF Book
Prefer a printable copy? Download the free CrochetEco toilet paper holder pattern book and keep it with your crochet notes.
Download the Free Crochet PDFFor standard crochet abbreviations and yarn-weight terminology, see the Craft Yarn Council standards .