Table of Contents
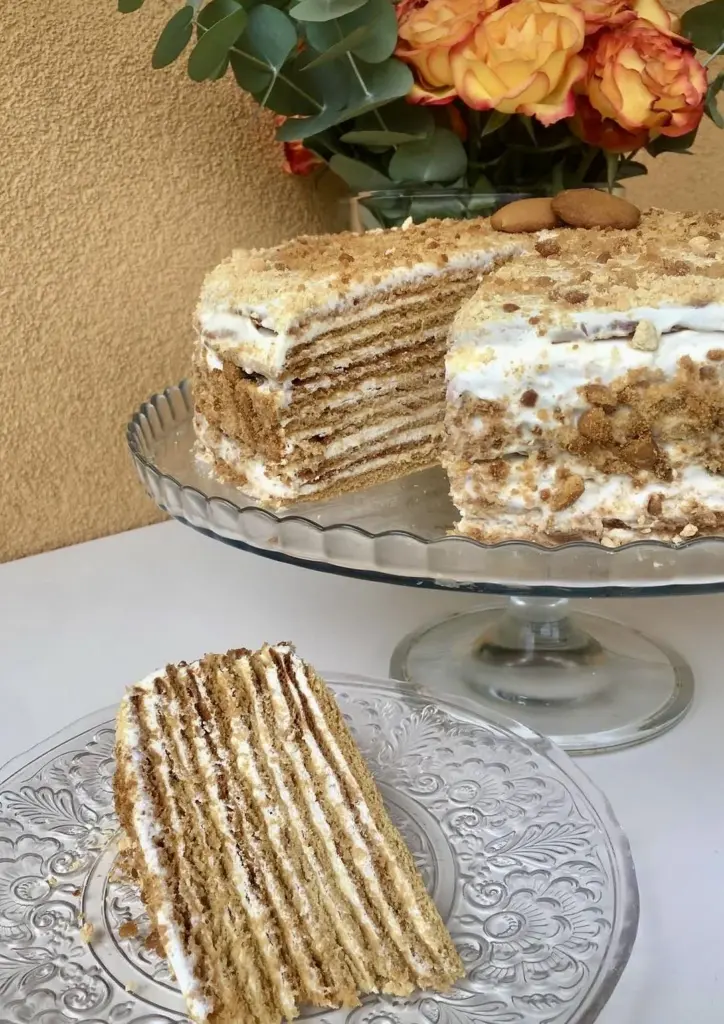
Russian honey cake, also called medovik, is a layer cake made with thin honey-flavored rounds and a tangy sour cream frosting. The layers soften as it chills, creating a tender, almost pudding-like bite. It is a beloved dessert in Russia and Eastern Europe, and it is simpler to make at home than it looks.
Quick Facts
- Skill level: Intermediate (some rolling and stacking)
- Time: About 1 hour active, plus 4–6 hours chilling
- Materials: Mixing bowls, saucepan, rolling pin, baking sheets, parchment paper, whisk or hand mixer, cooling rack
- Finished size: One 8-inch round layer cake, about 8–10 servings

What Makes Medovik Special
Medovik gets its name from med, the Russian word for honey. The cake is built from many thin, cookie-like layers. Once stacked with frosting and chilled, the layers soak up moisture and turn soft. The result is a cake that tastes like honey, caramel, and a little tang from the sour cream.
There are many family versions. Some cooks add walnuts, some use a little cinnamon, and some press crushed cake crumbs on the outside. The core idea stays the same: honey layers, creamy filling, and time in the fridge.
Step-by-Step Instructions
The exact recipe you use will vary, so follow your chosen recipe for precise amounts. The steps below explain the general method and what to expect at each stage.
1. Make the honey dough
Warm honey, sugar, and butter together until smooth. Let it cool slightly, then mix in eggs and flour to form a soft dough. The dough should be easy to roll but not sticky. If it is too soft, chill it for 30 minutes.
2. Roll and bake the layers
Divide the dough into equal pieces. Roll each piece very thin on parchment paper, then trim around an 8-inch plate or cake pan to make even rounds. Bake at about 350°F (175°C) for 5–7 minutes, until the layers are golden at the edges. Save the trimmings to bake and crush for decoration.
3. Make the sour cream frosting
Whip cold sour cream with powdered sugar and a little vanilla until thick and spreadable. Some recipes add a small amount of cream cheese or heavy cream for stability. Keep the frosting cool until you are ready to use it.
4. Stack and frost
Place one cooled layer on a serving plate. Spread a thin, even layer of frosting on top. Repeat with the remaining layers, ending with a layer on top. Frost the top and sides with the remaining frosting. Press crushed cake crumbs onto the sides and top if you like.
5. Chill before serving
Cover the cake loosely and refrigerate for at least 4 hours, or overnight. This rest is important. It lets the layers soften and the flavors come together. Slice with a sharp knife and serve cool.

Practical Tips & Troubleshooting
- Layers too dry? They will soften in the fridge. If the cake still seems dry after chilling, brush layers lightly with milk before frosting next time.
- Frosting too thin? Use cold sour cream and chill the bowl. A spoonful of cream cheese can help it hold.
- Uneven layers? Trim them with a plate or pan while they are still warm. Save the trimmings for crumbs.
- Cake sliding? Chill the cake for 30 minutes after the first few layers to set the frosting before adding more.
- Cutting clean slices: Use a sharp knife and wipe it between cuts. Cold cake slices more cleanly.
FAQs
Store it covered in the fridge for up to 3 days. The flavor often improves on the second day.
Yes. Bake the layers a day ahead and store them at room temperature in an airtight container. Frost and chill the cake the next day.
Sour cream is traditional, but some versions use a mix of sour cream and heavy cream or cream cheese. Use what you have and keep it cold.