Table of Contents
Crafting with children offers a wonderful opportunity to slow down, explore colors and textures, and build fine motor skills. When looking for an engaging project that captures young imaginations, sea creatures always prove to be a massive hit. Ocean-themed activities bring color and excitement to the craft table without requiring complicated tools or messy paints.
One delightful project that combines simple supplies into a charming result is a DIY yarn octopus craft for kids. By twisting textured materials, threading bright beads, and attaching a fuzzy body, children can create a vibrant underwater friend. This step-by-step guide walks you through gathering your supplies and putting the entire cute sea creature together.
Gathering Your Craft Supplies
Before you begin assembling your colorful sea friend, it helps to organize all your materials on a flat workspace. Having everything ready keeps the crafting session smooth and keeps little ones engaged from start to finish. You do not need expensive specialty gear to create this cheerful project.
Here is what you will need for your octopus project:
- Several colorful pipe cleaners (chenille stems) in various bright shades
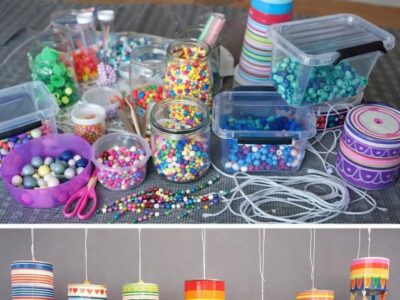
- A bowl of assorted small pony beads or multi-colored craft beads
- One large fluffy pink or brightly colored yarn pom-pom for the head
- A pair of googly eyes
- Craft glue or a low-temp hot glue gun (with adult supervision)
- A sheet of blue construction paper or cardstock for the background
- A black marker for drawing background details
Encouraging children to pick their own bead colors and pom-pom shades adds a personal touch to the final artwork. Let them sort through the beads to create patterns or random bursts of color.
Threading the Tentacles
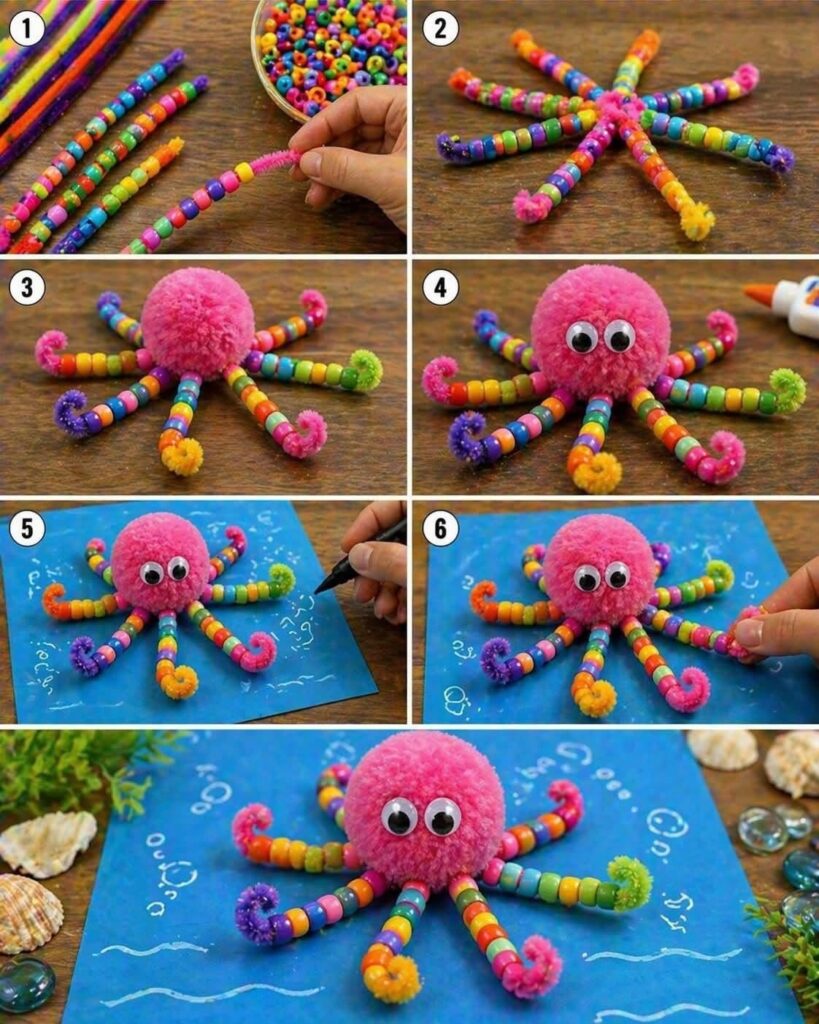
The first major step of this activity helps develop hand-eye coordination and finger dexterity. Take your pipe cleaners and lay them out on the table. Children can pick up individual beads and slide them carefully down each pipe cleaner one by one.
Leave a small empty space at both ends of each pipe cleaner so the beads do not slide off immediately. Once the pipe cleaners are mostly covered in a rainbow of beads, gently curl the very ends of the wire inward. This creates a secure stop for the beads and gives the octopus tentacles a playful, curly appearance.
Repeat this process for all the pipe cleaners you plan to use. Having about four to eight beaded stems gives the octopus a full, lively set of arms to dance around the ocean floor.
Assembling the Body and Face
With the tentacles fully beaded and curled at the tips, it is time to bring the creature together. Gather all the finished pipe cleaners and twist them tightly together at their exact centers. This central twist forms the anchor point where the arms radiate outward in a starburst pattern.
Next, take your large yarn pom-pom and secure it directly on top of that central twist. If you are using standard craft glue, hold the pom-pom firmly in place for a few moments until it grabs hold. For faster results, an adult can apply a dab of hot glue to secure the pom-pom firmly to the wire center.
Once the body is firmly attached, give your octopus some personality. Glue two googly eyes onto the front center of the yarn pom-pom. Position them closely together to maximize the cute factor of your finished ocean friend.
Creating an Underwater Scene
An ocean creature looks much happier when it has a proper home to explore. Take a piece of blue construction paper or cardstock to serve as your ocean background. You can mount your newly assembled octopus right in the center of the blue paper using a bit of glue.
Take your black marker and add playful details around the paper to mimic an underwater environment. Draw small bubbly circles floating upward, gentle wavy lines representing ocean currents, or tiny fish swimming in the distance. These little touches turn a simple craft into a complete story scene.
Allow the entire project to dry completely before lifting or displaying it on the refrigerator. Once dry, your DIY yarn octopus craft for kids is ready to show off to family and friends.
Helpful Tips for Success
To ensure your crafting session remains fun and stress-free, keep a few practical pointers in mind:
- Supervise younger children: Small beads and wires require close watching to ensure safety during play.
- Pre-bend the wire ends: If threading is tricky, fold one end over slightly before handing the pipe cleaner to a toddler.
- Protect your table: Lay down a silicone mat or a large sheet of butcher paper for easy cleanup if using liquid glue.
By keeping the steps manageable and letting children take the lead on color choices, everyone enjoys a creative and rewarding afternoon.
Frequently Asked Questions
What age group is best suited for this craft?
This activity works wonderfully for children ages five and up, as threading beads helps refine fine motor skills. Younger toddlers can also participate with adult assistance during the wire-bending and gluing stages.
Can I use regular yarn instead of a pom-pom?
Yes, if you do not have a pre-made pom-pom, you can easily wrap yarn around a piece of cardboard to make your own fluffy sphere, or use a crumpled ball of tissue paper covered in yarn scraps.
What is the best type of glue to use?
Tacky craft glue works well for bonding yarn to pipe cleaners, though it requires a bit of drying time. Low-temperature hot glue provides an instant hold if managed carefully by an adult.
Creating handmade projects together builds lasting memories and sparks a lifelong love for making things by hand. The next time you need a rainy-day activity, gather some simple supplies and try this engaging DIY yarn octopus craft for kids.