Table of Contents
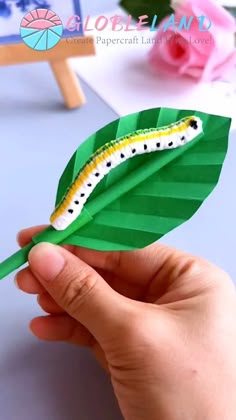
If you are looking for a simple craft that turns into a playful toy, a DIY moving caterpillar with paper is a perfect choice. This project uses basic materials you likely already have at home—paper, scissors, and a little glue—to create a wiggly caterpillar that actually inches forward when you tap it from behind. It is an excellent hands-on activity for children, blending fine motor practice with the joy of making something that moves. Whether you are a parent, teacher, or caregiver, this paper toy offers a rewarding and screen-free way to spend creative time together.
Why Make a Paper Caterpillar That Moves?
Children are naturally drawn to toys that move, and a DIY moving caterpillar with paper gives them the chance to build that motion themselves. Unlike static crafts, this one comes to life with a simple push. The movement works through an accordion-style fold that compresses and springs back, mimicking a caterpillar’s crawling action.
This project also helps develop hand-eye coordination and patience. Cutting, folding, and gluing small pieces reinforce fine motor skills in a way that feels like play. Plus, once the caterpillar is complete, kids can decorate it however they like, adding personality with markers, googly eyes, or even patterns on each segment.
Another benefit is the cost. You need no special kits or expensive supplies. A few sheets of colored paper, a pencil, and some glue are enough to get started. That makes this an ideal activity for classrooms, rainy afternoons, or craft parties where you need an engaging, low-prep project.
Materials You Will Need
To create a moving caterpillar with paper, gather these simple items. Most can be found around the house or in a basic craft drawer.
- Colored paper (green works well, but any color is fine)
- A pair of scissors
- A glue stick or white glue
- A pencil or pen for marking folds
- A ruler (optional, but helpful for neat strips)
- Googly eyes or a black marker for the face
- Small decorative items like stickers or bits of colored paper (optional)
Choose paper that is not too thick. Standard printer paper or construction paper bends easily and holds the accordion folds well. Cardstock is too stiff for the caterpillar to crawl properly.
Step-by-Step Instructions for the Moving Caterpillar
Step 1: Cut the Paper Strips
Begin by cutting your colored paper into long strips. You will need about six to eight strips, each roughly 1 inch wide and as long as the paper allows. For a standard 8.5 x 11 inch sheet, that means strips about 11 inches long. The number of strips determines your caterpillar’s length. More strips make a longer body that wiggles more visibly.
Step 2: Create the Accordion Folds
Take one strip and fold it back and forth like a fan or accordion. Each fold should be about 0.5 inches wide. Crease each fold firmly with your fingernail. Repeat this for every strip. Try to keep the fold widths consistent so the caterpillar moves evenly. This accordion style is what makes the caterpillar crawl when pushed.
Step 3: Connect the Strips
Apply a small dab of glue to the end of one folded strip. Attach it to the end of the next folded strip, so the two pieces form a continuous zigzag. Join all the strips this way until you have one long, folded chain. Let the glue dry briefly before moving on.
Step 4: Shape a Head
Cut a small circle or oval from a different color of paper, or use the same color if you prefer. This will be the caterpillar’s head. Glue or draw two eyes on it. You can also add antennae by cutting two tiny strips and curling them around a pencil. Attach the head to one end of the folded body chain.
Step 5: Test the Movement
Place the caterpillar on a flat, smooth table or floor. Gently tap or push the back end of the body. The accordion folds should compress and then expand, making the caterpillar crawl forward a little bit. If it does not move well, check that your folds are crisp and the paper is not too thick. You can also try a lighter tapping motion.
Tips for Making the Caterpillar Crawl Better
Getting the movement just right can take a little adjustment. Here are some useful tips to improve the crawling action of your DIY moving caterpillar with paper.
- Use lightweight paper. Construction paper or thin craft paper works best. Avoid thick cardstock.
- Make crisp folds. Run your fingernail along each crease to make it sharp. Bumpy folds reduce movement.
- Keep segments short. Fold widths around half an inch create a better spring effect than wider folds.
- Test on a smooth surface. A tabletop or hard floor works well. Carpet or rugs will slow or stop the caterpillar.
- Add a little friction. If the caterpillar slides instead of crawls, try lightly roughening the bottom edges with sandpaper or attaching tiny pieces of sticky tack to the folds.
If your caterpillar still does not crawl far, check that all strips are attached end-to-end without gaps. A continuous chain is essential for the motion to travel from the back to the front.
Creative Variations and Decorations
Once you master the basic design, you can customize your caterpillar in many ways. Try using different colors for each segment to create a rainbow caterpillar. Add numbers or letters to the segments for a learning twist. For a springtime theme, glue tiny paper flowers around the caterpillar’s path.
You can also experiment with size. A smaller caterpillar with narrower strips moves quickly but is harder to handle. A larger version with wider strips is easier for small hands to assemble and shows the crawling motion more clearly. For a group activity, have each child make one segment and then combine them into a long class caterpillar.
Another fun idea is to attach the caterpillar to a cardboard leaf or branch using a loose loop of string. That way, it appears to crawl toward its next snack. This turns the craft into a small diorama that children can play with and tell stories about.
Frequently Asked Questions
Why does the caterpillar need accordion folds?
The accordion fold creates a spring-like structure. When you tap the back, the folds compress and then push forward, mimicking the way a real caterpillar moves its body segments. Without the folds, the paper would just slide or stay still.
Can I use recycled paper for this craft?
Yes, recycled paper works fine as long as it is thin enough to fold easily. Magazine pages, old wrapping paper, or pages from a notebook are good choices. Avoid glossy or coated paper, as it does not hold creases well.
How can I make the caterpillar move without touching it?
You can tilt the surface slightly so gravity helps the caterpillar slide forward. Another method is to gently blow air from behind the caterpillar. The air pushes the light paper folds and triggers the crawling motion. For a more advanced version, attach a lightweight string to the head and pull gently from the front.
Conclusion
A DIY moving caterpillar with paper offers a wonderful blend of crafting, science, and play. It teaches children how simple folds can create movement, all while using materials that are easy to find and affordable. The project can be completed in under an hour, and the result is a charming toy that provides lasting entertainment. As you help the caterpillar inch across a table, you will see how a little creativity and a few strips of paper can bring something special to life. Build one today and watch the wiggly fun begin.