Table of Contents
- Crochet Granny Squares in Various Colors and a Ball of Yarn: How to Plan, Make and Join Them
- What you need
- What a granny square actually is
- Yarn weight, hook size and the gauge that matters
- Choosing colors from one ball and a few leftovers
- Working the square, round by round
- Joining squares so the seams stay flat
- When it goes wrong
- Sizing a project from your squares
- Step
- Ways to change it
- The short version
- Questions people ask
- You might also like
Crochet Granny Squares in Various Colors and a Ball of Yarn: How to Plan, Make and Join Them
Pick your colors, work a flat square that lies straight, and join them without a single wavy edge.
A granny square is three rounds of double crochet clusters worked into the same corner space, and almost every wobbly, curling square you have ever seen comes from the corners, not the stitches.
You have a ball of yarn, maybe four or five of them in colors that look good together, and a pile of squares that are almost right. The middle bulges. One corner pulls in. The colors fight each other. None of that is a skill problem. It is a counting and corner problem, and it fixes fast.
Here is the whole idea in one breath: a granny square grows outward in rounds, and each round adds one cluster to every side. Get the corner chains right and the square stays square. Get them wrong and no amount of blocking will save it.
A classic granny square is a small square worked in the round from one corner to the next, with chain-two or chain-three corner spaces that keep it flat. Start with a magic ring or a chain of four, work three double crochet clusters per side, and change colors at the end of any round.
What you need
Worsted or aran yarn
One ball per color is plenty for a few squares. Use leftovers for the middle rounds and save full balls for the outer rounds so the palette stays even.
5 mm crochet hook
Go up to 5.5 mm if your squares curl, down to 4.5 mm if they ruffle. A hook with a soft grip helps on long evenings.
Yarn needle
A blunt-tipped needle with an eye wide enough for worsted yarn. Needed for weaving tails and for sewing squares together.
Tape measure or ruler
You will measure one square and then trust that number for the whole project.
Scissors
Small sharp ones. Keep them with the project or you will be hunting for them every color change.
What a granny square actually is
A granny square is a square worked in the round. You start in the middle, work a small ring, then add rounds around it. Each round is made of clusters, usually three double crochet stitches worked together into one space.
The corners are the trick. At each corner you work a cluster, then a chain, then another cluster into the same space. That chain is what lets the square turn the corner without pulling tight. Two chains gives a tight, firm corner. Three gives a looser, more open one. Pick one and stay with it for the whole project, or your squares will not match.
- dc: double crochet (US) or treble crochet (UK)
- ch: chain
- sl st: slip stitch
- cluster: three dc worked into the same space
- round: one complete circuit of the square
Write your corner chain count on a sticky note and keep it on the table. Most mismatched squares come from switching between two and three chains halfway through a project.
Yarn weight, hook size and the gauge that matters
Medium weight yarn, the kind sold as worsted or aran, is the easiest to learn on. It shows the stitches clearly and it does not split. A 5 mm hook suits most worsted yarns. If your yarn label suggests 4.5 mm, try that first and go up if your square curls.
Gauge matters here more than people expect. Work one square, measure it flat, and write the number down. If your square measures 10 cm across and the pattern says 12 cm, every square in a blanket will be short, and the whole thing will pull. Change hook size until one square matches, then make the rest.
For a blanket, a common square is about 12 cm across worked in worsted yarn with a 5 mm hook. That is a starting point, not a rule. Measure your own.
If you only have fine yarn, go down to a 3.5 mm or 4 mm hook and accept smaller squares. You will need more of them, but the fabric will be firmer and the joining easier.
Choosing colors from one ball and a few leftovers
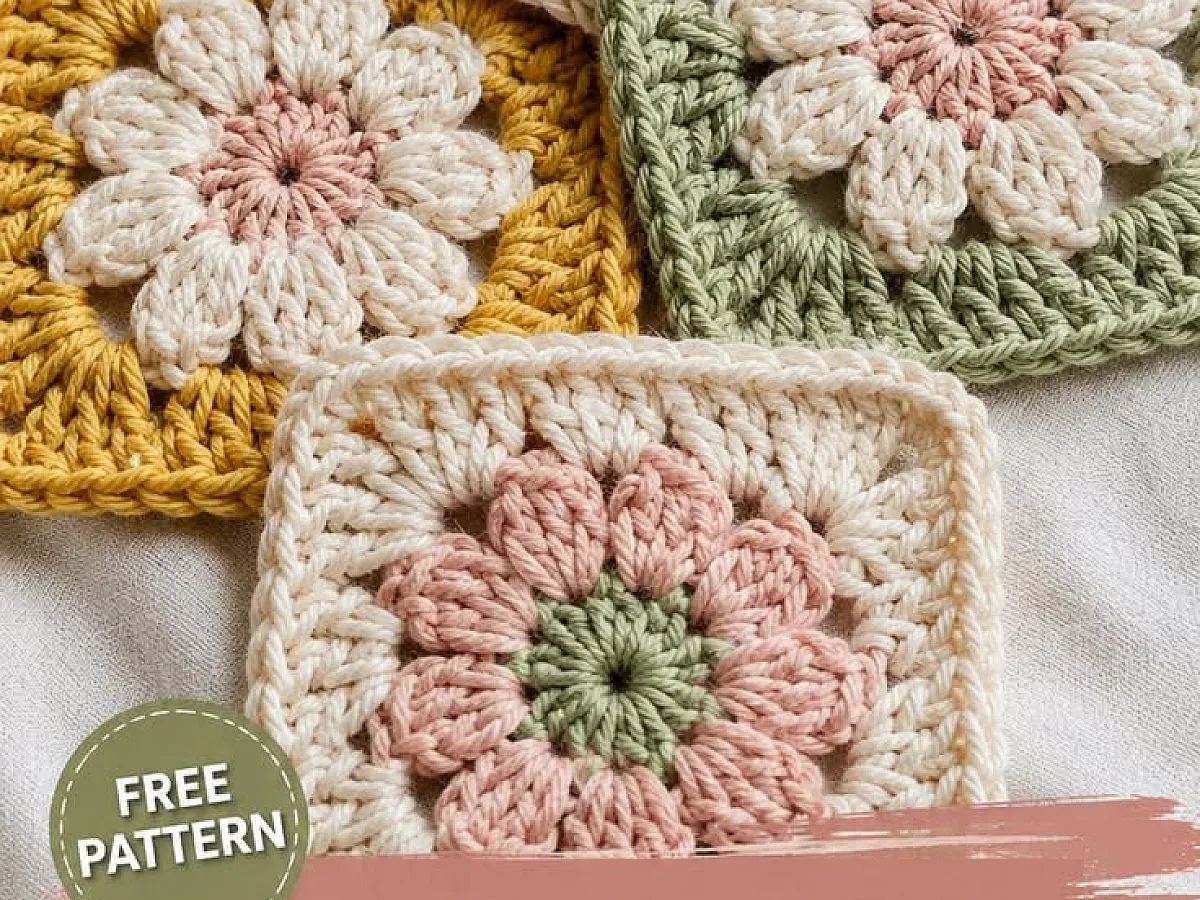
The photograph shows the honest version of this craft: several finished squares in different colors and one ball of yarn sitting beside them. That is how most real projects look. You rarely buy a full set for one blanket. You build a palette from what you have.
A simple way to keep it from looking messy is to pick one light, one dark, and one color in between. Use the light and dark for the outer rounds and let the middle color move around. Squares made this way read as one family even when no two are identical.
Change color at the end of a round. Finish the round with a slip stitch, cut the yarn leaving a 10 cm tail, pull it through, and join the new color in any corner chain space. Weave the tails in as you go, not at the end. A blanket with two hundred loose tails is a blanket that never gets finished.
Lay finished squares on the floor in daylight before you join anything. Colors that look fine under a lamp can clash badly by a window.
Working the square, round by round
The order below makes a flat square with four clear corners. Follow it once slowly, then it becomes muscle memory.
Count your clusters at the end of every round. A round with four sides should have four clusters per side plus the corner clusters. If a side is short, you missed a space, and the next round will be crooked.
Joining squares so the seams stay flat
You can sew squares together with a yarn needle and a length of the same yarn, or crochet them together with slip stitch or single crochet. Sewing gives the flattest seam. Single crochet joining gives a raised ridge, which some people like as a design line and others hate.
For a flat seam, hold two squares right sides together and sew through the back loop of each edge stitch. Work from corner to corner, one stitch to one stitch. Do not pull tight. The seam should sit level with the fabric, not dig into it.
Join in strips first, then join the strips. Long strips are easier to keep straight than a whole blanket laid out at once.
If your joined piece ripples, the seams are too tight, not the squares. Undo the last strip and sew it again with a looser hand.
When it goes wrong
The square curls into a bowl. Usually the starting ring is too tight, or you are working too few stitches into the corners. Try a larger hook for the first round only, or loosen your tension on the starting chain.
The square ruffles and will not lie flat. That is too many stitches, most often an extra cluster squeezed into a side. Count the clusters on each side and compare them to the round before.
The corners are rounded instead of pointed. You are probably skipping the chain between the two corner clusters. Work the cluster, chain two, then the second cluster into the same space.
The colors look muddy. Too many mid-tone colors in one square will do that. Give each square one strong light or one strong dark round to separate the rest.
Sizing a project from your squares
Measure one finished square, then decide how big the finished piece should be. A baby blanket around 70 cm by 90 cm needs about thirty squares at 12 cm each, plus a border. A cushion cover of 40 cm takes nine.
Add a border of one or two rounds of single crochet around the whole piece at the end. It squares up the outer edge and hides the small differences between squares. Without it, the outside edge always looks slightly uneven.
Step
Make the center ring
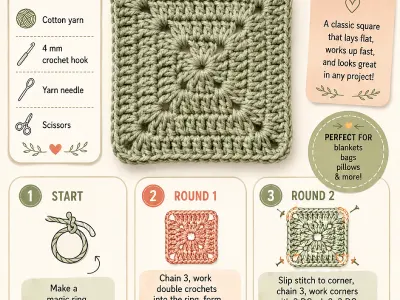
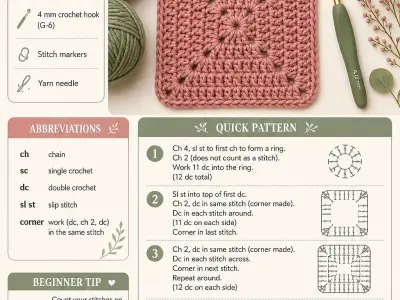
Chain four and join with a slip stitch, or use a magic ring. Work twelve double crochet into the ring and join. You should have a small flat circle with no hole in the middle.
Work round one
Chain three, then work two double crochet into the same space to make your first cluster. Chain two, then work three more clusters into the next spaces around, with two chains between each. Join with a slip stitch. You should have four clusters and four corner chains.
Work round two
Slip stitch into the first corner space. Work a cluster, chain two, cluster into that corner. Then chain one and work a single cluster into the next space along the side. At the next corner, work cluster, chain two, cluster. You should now have two clusters on each side and four clear corners.
Keep adding rounds
Each new round adds one cluster to every side. Slip stitch along to the next corner space to begin, and remember the chain one between side clusters. Check that each side has the same number of clusters before you join the round.
Fasten off and block
Cut the yarn, pull the tail through, and weave it in. Damp the square, pin it square on a board, and let it dry flat. Blocked squares measure truer and join more easily.
Ways to change it
Solid single color
Work every round in one color for a calmer look. Faster, because there are no color changes to weave in.
Two-color alternating
Swap between two colors every round. Gives a strong graphic pattern without needing many balls.
Scrap squares
Use whatever is in the basket, one color per round. Suits a stash-busting blanket but needs a light or dark border on every square to hold it together.
Smaller squares for a cushion
Drop to a 4 mm hook and finer yarn. You get squares around 8 cm, which suit a cushion cover of sixteen squares.
Raised join
Join with single crochet instead of sewing. The ridge becomes a visible grid across the blanket, which some people prefer to a flat seam.
The short version
- A granny square is built from clusters of three double crochet, with two or three chains at each corner.
- Keep the same corner chain count for the whole project or the squares will not match.
- Measure one square before making the rest, and change hook size until it matches your target.
- Change color at the end of a round and weave tails in as you go.
- Sewn seams lie flatter than crocheted joins, which leave a raised ridge.
- A single crochet border around the finished piece squares up the outer edge.
Questions people ask
How many granny squares do I need for a blanket?
At about 12 cm per square, a baby blanket of 70 by 90 cm takes roughly thirty squares plus a border. A throw of 120 by 150 cm takes around a hundred. Measure your own square first, because the count changes fast with size.
Why is my granny square not square?
The corners are usually the cause. Check that you work a cluster, two chains, then a cluster into each corner space, and that every side has the same number of clusters. Blocking fixes small differences but not a missed corner.
Can I use different yarn weights in one project?
You can, but the squares will come out different sizes and the joins will show. If you want to use up odd balls, keep the same weight and change hook size to match the square measurement.
Do I have to block granny squares?
No, but it helps. A quick damp block pulls the corners out and makes joining much easier. Skip it and the squares will still work, they will just be harder to line up.
What is the best way to join granny squares?
Sewing with a yarn needle through the back loops gives the flattest seam. Single crochet joining is faster and leaves a raised ridge. Both hold well, so pick the look you want.
Grab your hook and one square, and see how it measures
Make one square tonight. Measure it, look at it in daylight, and decide if the colors and the size are right before you commit to thirty more. Taste, adjust, enjoy.