There is something universally satisfying about watching a toy spin. It captures our attention, creates a mesmerizing blur of color, and provides a simple, tactile distraction that works for both children and adults. If you are looking for a quick, budget-friendly project that yields instant gratification, creating an easy DIY spinning colorful paper spinner is the perfect solution. These little toys are surprisingly durable, endlessly customizable, and require very few materials to bring to life.
The Joy of Simple Toys
In an age of complex electronics and battery-operated gadgets, there is a refreshing return to analog play. Paper spinners fall into this category of simple, open-ended toys. They rely on basic physics—specifically angular momentum and balance—rather than circuits or code. When you hold one of these spinners on your finger, you become the power source. The interaction between your skin, the wooden axle, and the paper disc creates a unique sensory experience.
These spinners are excellent for developing fine motor skills. Holding the spinner steady while applying the right amount of friction to get it moving requires coordination. Furthermore, the act of making them involves cutting, drawing, and punching holes, which helps refine hand-eye coordination and dexterity. Whether you are a parent looking for a rainy-day activity or an adult seeking a moment of mindfulness, these crafts offer a low-stakes creative outlet.
Gathering Your Supplies
The beauty of this project lies in its accessibility. You likely have everything you need in your home right now. You do not need specialized craft tools or expensive kits. Here is a list of the basic materials required to get started:
- Cardstock or heavy paper: Standard printer paper is too flimsy and will tear easily. You want something with a bit of stiffness, like construction paper, old greeting cards, or cereal boxes.
- Scissors: A pair of sharp craft scissors works best for cutting clean circles.
- Markers, crayons, or colored pencils: These are essential for adding the vibrant designs that make the spinner look interesting when it rotates.
- Toothpicks or wooden skewers: These serve as the axle. Toothpicks are generally easier to handle for smaller spinners, while skewers work well for larger discs.
- A hole punch or a pin: You will need a way to create a hole in the center of your paper disc.
Step-by-Step Construction
Creating the base of your spinner is straightforward. Start by cutting a circle out of your cardstock. The size is up to you, but a diameter of about 2 to 3 inches usually provides the best balance between spin time and ease of handling. You can use a compass, a circular object like a cup to trace around, or simply freehand it if you prefer a rustic look.
Once you have your circle, it is time to add your design. This is the most important part of the process because the visual effect depends entirely on what you draw. Use your markers or crayons to fill the circle with color. You can do solid blocks of color, stripes, or intricate patterns. The key is to ensure the design is centered so the spinner remains balanced.
Next, locate the exact center of your circle. You can do this by folding the paper in half twice to create an ‘X’ crease; the intersection is your center point. Use a hole punch or a pin to make a small hole right in the middle. Be careful not to make the hole too large, or the toothpick will wobble.
Finally, insert your toothpick or skewer through the hole. The length of the stick sticking out the bottom acts as the handle you will hold, while the top part acts as the pivot point. If the stick is too long, you can trim it with scissors. If it is too short, you might need to tape a small piece of paper or cardboard to the bottom to give yourself something to grip.
Creative Design Ideas
The visual appeal of a spinner comes from the optical illusion created when it rotates. Static patterns transform into new shapes and colors when they spin. Here are a few design concepts inspired by popular spinner styles:
Concentric Circles
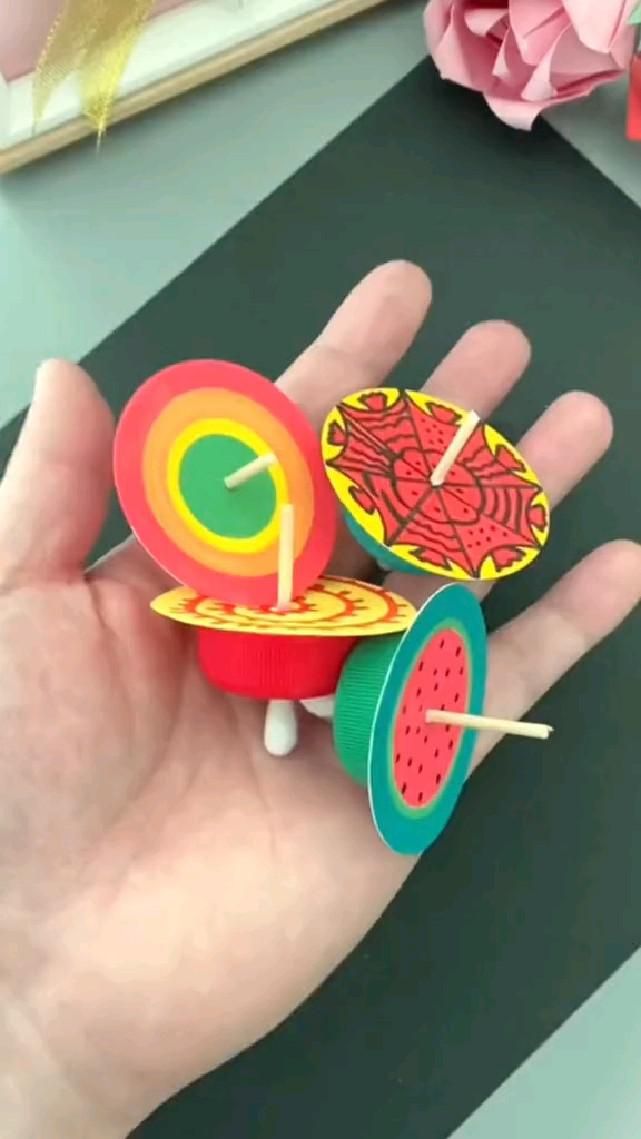
Draw rings of different colors radiating from the center. When the spinner is still, it looks like a target. When it spins, the colors blend together to create a hypnotic, swirling effect. Using contrasting colors like red, yellow, and green makes the blending effect even more dramatic.
Geometric Patterns
Try drawing a spiderweb or a starburst pattern. These designs rely on symmetry. If you draw a line from the center to the edge and repeat it four or eight times, you create a balanced wheel. When spun, a spiderweb pattern can look like a pulsating flower or a complex geometric mandala.
Nature Themes
You can turn your spinner into a mini illustration. A watermelon slice design, with a green rind, white inner rind, and red center with black seeds, is a fun and recognizable theme. The contrast between the green and red is visually striking when the disc is in motion.
Tips for the Perfect Spin
While making the spinner is easy, getting it to spin smoothly takes a little practice. Here are some tips to ensure your creation performs well:
- Balance is everything: If your spinner wobbles or falls off your finger, it is likely unbalanced. Check that your hole is perfectly in the center. If you drew a heavy, dark design on one side, try adding a similar amount of ink to the opposite side to counterweight it.
- Smooth the edges: Rough edges can catch the air or your skin, slowing down the spin. If your scissors left jagged bits, gently sand them down or trim them carefully.
- Find the right friction: To spin the toy, place the tip of the toothpick on your finger and apply gentle pressure while twisting your wrist. You want enough friction to grip the wood, but not so much that it stops immediately. A slightly dry finger often works better than a sweaty one.
- Experiment with weight: If your spinner is too light, it might spin too fast and fly off your finger. You can add a small piece of tape or a tiny bead to the bottom of the axle to add weight and stability.
Frequently Asked Questions
How long do these paper spinners last?
With careful handling, they can last a long time. The main point of wear is the center hole. If the paper starts to tear around the toothpick, you can reinforce it by gluing a small square of tape over the hole before inserting the