Table of Contents
- What Is a Full Windsor Knot?
- How to Tie the Full Windsor Knot in 11 Steps
- How to Get the Tie Length Right
- How to Make a Neat Tie Dimple
- Which Shirt Collar Works Best?
- Common Full Windsor Knot Mistakes and Fixes
- Full Windsor vs. Half Windsor vs. Four-in-Hand
- When Should You Wear a Full Windsor Knot?
- How to Untie a Full Windsor Without Damaging the Tie
- Frequently Asked Questions
- Sources and Further Reading
The Full Windsor knot gives your tie a wide, neat triangle that looks especially good with a dress shirt and suit. To tie it, start with the wide end on your right, cross it over the narrow end, build two wraps around the neck loop, and finish by bringing the wide end through the band at the front. Follow these 11 steps to get the shape and length right.
- Difficulty: Intermediate beginner
- Practice time: About 3–5 minutes
- Knot shape: Large, wide, symmetrical triangle
- Best collar: Spread or cutaway
- Best occasions: Weddings, interviews, and formal events
- You need: A necktie, collared shirt, and mirror

What Is a Full Windsor Knot?
The Full Windsor is one of the larger traditional necktie knots. It has a balanced, triangular shape and fills more of the space between your shirt collar points than a smaller knot.
You may also hear it called the Double Windsor. Both names are commonly used for this style, although some knot specialists distinguish between them.
The knot works particularly well for weddings, formal business events, and occasions when you want a traditional, polished look.
It uses more of the tie’s length than a simple Four-in-Hand, so starting with the right amount of fabric makes a difference.
How to Tie the Full Windsor Knot in 11 Steps
Stand in front of a mirror and raise your shirt collar. Button the top button before you begin.
All directions below refer to your own left and right, not the sides you see in the mirror.
There are two parts of the tie: the wide end, which you will move throughout the tutorial, and the narrow end, which mostly stays in place.
Before you begin: Let the wide end hang roughly 12–14 inches (30–36 cm) below the narrow end. This is a starting guide, not a fixed measurement. Your height, tie length, and fabric thickness will affect the final position.
- Position the tie. Place the wide end on your right and the narrow end on your left. Keep the front of the tie facing outward.
- Cross the wide end over. Bring the wide end over the narrow end toward your left. Hold the crossing point near your collar.
- Bring it up through the neck loop. Lift the wide end through the opening between your tie and neck, passing from underneath to the front.
- Lower it on the left. Pull the wide end down to your left side. You have formed the first part of the knot.
- Move behind the narrow end. Take the wide end across the back of the narrow end, moving from left to right.
- Lift it toward the neck loop again. Bring the wide end upward on your right, approaching the neck loop from the front.
- Pass it through to the right. Feed the wide end down through the neck loop so it comes out on your right side. You should now have a wrap on each side of the forming knot.
- Wrap across the front. Bring the wide end horizontally across the front from right to left. Keep this new band slightly loose because you will need to pass the tie through it.
- Bring the wide end up once more. Lift it from underneath through the neck loop. Hold the front horizontal band open with a finger.
- Feed it through the front band. Pull the wide end downward through the horizontal band you made in Step 8. Straighten the fabric as it passes through.
- Tighten and shape the knot. Gently pull the wide end downward while holding the knot. Slide the knot up toward your collar, center it, and adjust the sides into an even triangle.
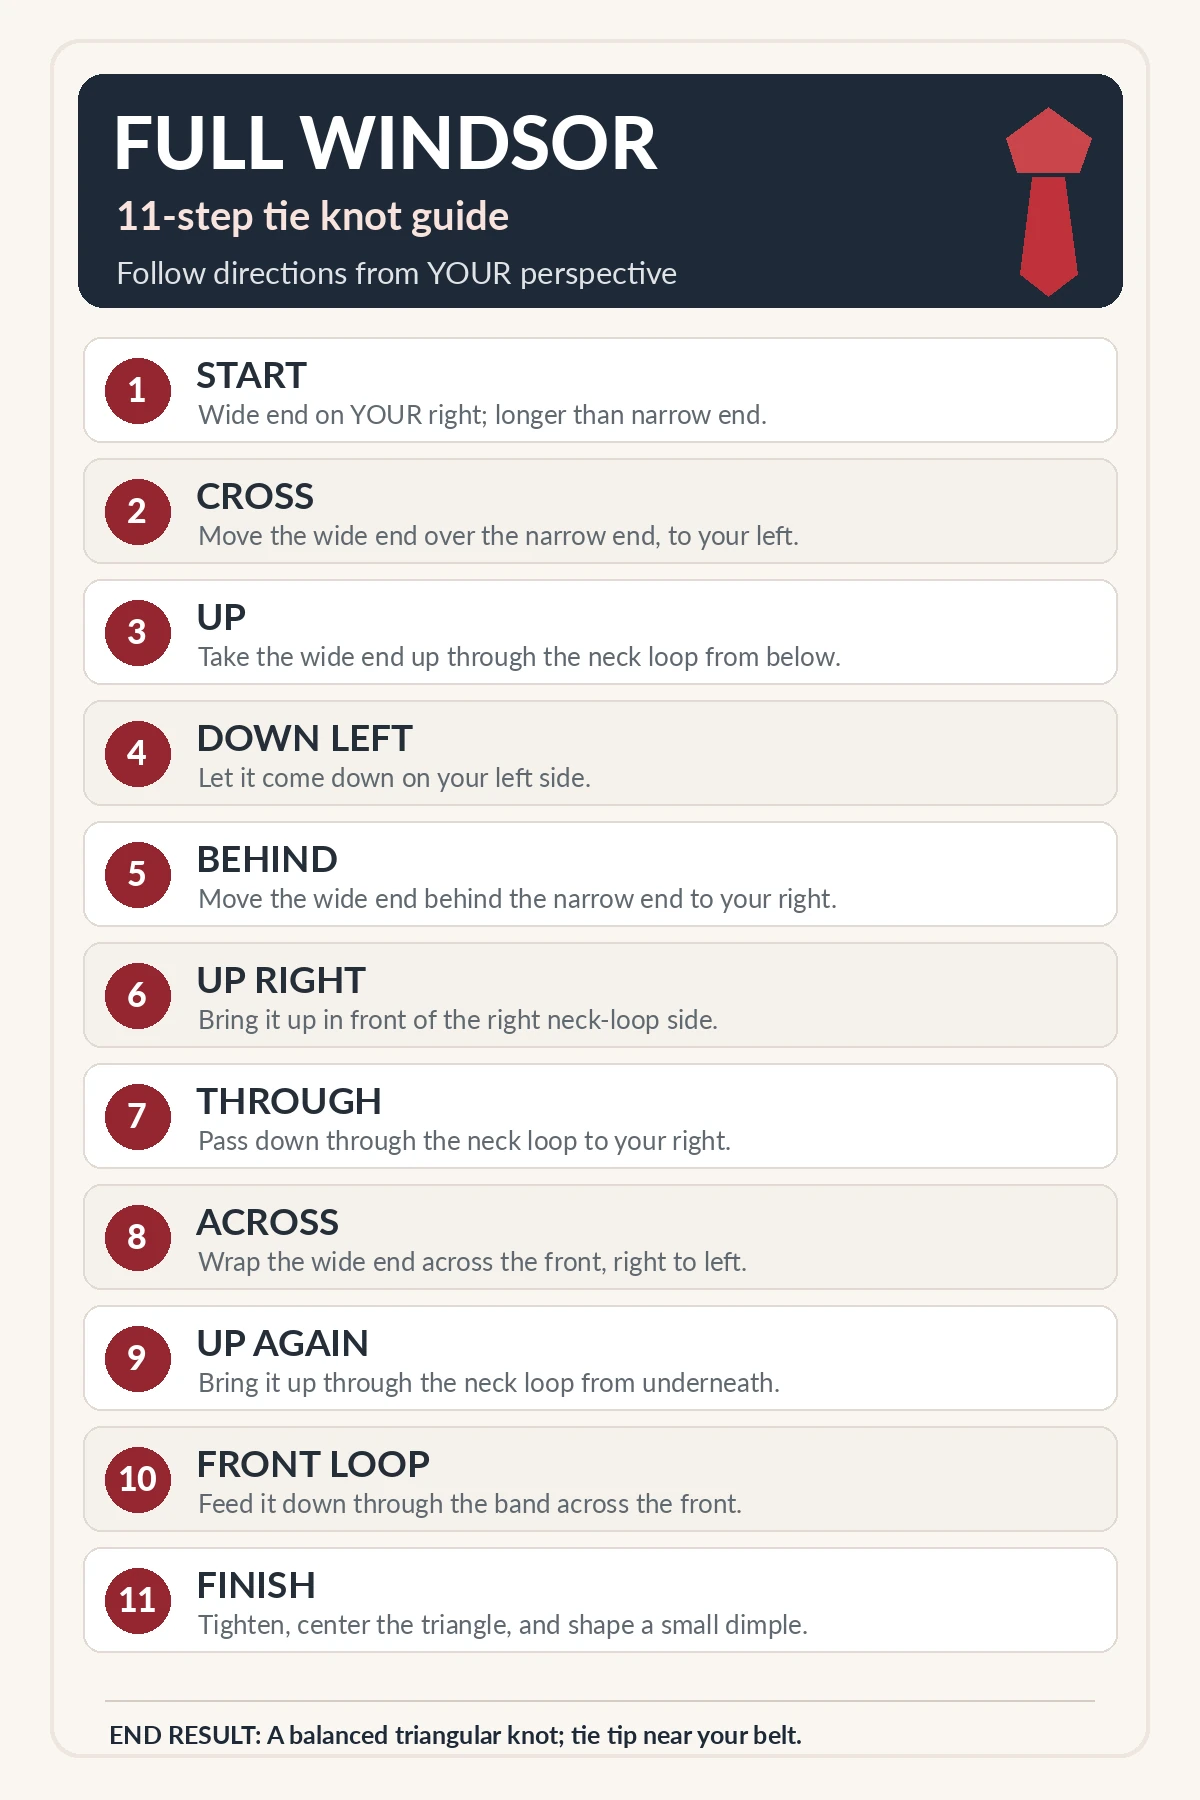
First-time tip: Do not tighten the knot after every movement. Keep the wraps neat but loose enough to move the fabric. Shape and tighten the final triangle only after the wide end passes through the front band.
How to Get the Tie Length Right
A well-tied Windsor can still look awkward if the tie hangs too high or too low.
As a general styling guide, the tip of the wide end should finish near the middle of your belt buckle when you are standing normally.
If the Tie Is Too Short
Untie it and begin with the wide end hanging lower. The Full Windsor uses a fair amount of fabric, so a short starting length leaves less tie visible below the knot.
If the Tie Is Too Long
Start again with the narrow end hanging a little lower and the wide end relatively higher.
If You Are Tall
A standard-length tie may finish too high after forming a Full Windsor. An extra-long tie can help you achieve the right knot size without sacrificing the finished length.
It is usually better to correct the starting position than to pull the finished knot excessively tight to change the length.
How to Make a Neat Tie Dimple
A small dimple just beneath the knot helps the tie look more natural and gives the front fabric a little shape.
- Finish tying the knot but leave it slightly loose.
- Place one finger in the middle of the wide end just below the knot.
- Pinch the fabric gently on either side of your finger.
- Hold that fold while pulling the wide end downward.
- Slide the knot into place and check the dimple in the mirror.
You do not need a deep crease. A subtle centered fold looks good with most silk ties.
Which Shirt Collar Works Best?
The Full Windsor works best when the shirt collar leaves enough space for a broad knot.
| Collar | Full Windsor Fit | Reason |
|---|---|---|
| Spread collar | Excellent | Gives the wide knot room |
| Cutaway collar | Excellent | Balances the broad triangle |
| Classic point collar | Depends | May look crowded |
| Narrow collar | Less suitable | Knot may overwhelm the opening |
A medium-weight silk tie is usually a practical choice. Very thick wool or bulky knit ties can make an already-large knot look oversized.
Common Full Windsor Knot Mistakes and Fixes
| Problem | Likely Cause | Easy Fix |
|---|---|---|
| Knot looks uneven | One wrap is tighter than the other | Loosen and balance both sides |
| Front band is twisted | Wide end turned during wrapping | Flatten the tie before Step 8 |
| Cannot feed wide end through | Front band is too tight | Leave a finger under the band |
| Knot looks oversized | Thick tie or narrow collar | Choose a lighter tie or smaller knot |
| Tie ends too high | Not enough fabric left below | Start with wide end lower |
| Tie hangs too low | Wide end started too low | Shorten its starting drop |
Full Windsor vs. Half Windsor vs. Four-in-Hand
The Full Windsor is not automatically the right choice for every shirt or occasion. Smaller knots can look better with narrow collars, thick fabrics, or more relaxed outfits.
| Knot | Appearance | Best Use |
|---|---|---|
| Full Windsor | Large and symmetrical | Formal outfits, spread collars |
| Half Windsor | Medium, fairly balanced | Office wear, versatile collars |
| Four-in-Hand | Small and slightly asymmetrical | Everyday wear, narrow collars |
If the Full Windsor seems too large with your favorite shirt, try the Half Windsor before changing your entire outfit.
When Should You Wear a Full Windsor Knot?
A Full Windsor suits formal and traditional clothing particularly well.
- Weddings: A neat option for a groom, groomsman, or guest wearing a classic suit.
- Job interviews: Works with a conservative dress shirt and suit, especially when the collar is wide enough.
- Business presentations: Offers a balanced, structured appearance.
- Formal dinners: Pairs nicely with traditional tailoring.
- Graduations: A polished choice when wearing a dress shirt and tie.
The occasion matters less than the proportions. A smaller knot that fits your collar usually looks better than an oversized knot forced into a narrow opening.
How to Untie a Full Windsor Without Damaging the Tie
After wearing your tie, loosen the knot gently rather than yanking the narrow end through it.
Work backward through the final front band, then release the wraps one at a time. This reduces unnecessary stretching and creasing.
Hang the tie or roll it loosely according to its fabric and care instructions. Avoid leaving it tightly knotted overnight.
Frequently Asked Questions
Is the Full Windsor knot hard to tie?
It takes more movements than a Four-in-Hand, but the sequence becomes easier with practice. Most beginners find the second neck-loop wrap and the final front band the trickiest parts.
Is a Full Windsor the same as a Double Windsor?
The names are commonly used interchangeably in menswear guides, although some knot specialists use more specific definitions.
Is a Full Windsor good for a wedding?
Yes. It has a traditional, symmetrical look that works well with a formal suit and spread-collar shirt.
Can I tie a Full Windsor with a skinny tie?
You can try, but the result may be smaller and less balanced than with a standard-width tie. The thickness of the fabric also affects the finished knot.
Where should the end of my tie reach?
A common guideline is for the wide tip to rest near your belt buckle. Adjust the starting position if it ends much higher or lower.
Why is my Windsor knot not symmetrical?
One side may be tighter, the tie may have twisted, or the front wrap may not be centered. Keep the fabric flat while tying, then adjust the sides before fully tightening.
Sources and Further Reading
For additional visual demonstrations, see the Ties.com Windsor Knot Guide and the OTAA Windsor Knot Tutorial.