Table of Contents
You know that moment around three in the afternoon when you would trade your left shoe for a Snickers bar? I have been there more times than I can count. The nougat, the caramel, the chocolate coating, the little crunch of peanuts. It hits a very specific spot. But the sugar crash that follows always leaves me feeling worse than before. That is where this idea comes in. A healthier Snickers alternative that genuinely scratches the same itch while giving your body something useful to work with. And I am going to say something bold. It tastes even better than the original.
The concept is simple. Layer a soft, slightly chewy protein base with a sticky peanut butter caramel, then cloak the whole thing in real dark chocolate. What you get is a bar that satisfies every single texture and flavor note you remember from childhood candy bars, minus the ingredients you cannot pronounce. The star of the show is high-quality dairy protein. When you start with milk that comes from grass-fed, hormone-free cows, you taste the difference immediately. Cleaner flavor, no weird aftertaste, and a creaminess that cheap protein powders never achieve.
This is not about restriction or saying no to joy. It is about building something better. When real ingredients come together the right way, you stop feeling like you are missing out. You start feeling like you found a secret. Let me walk you through why this works, how to make it, and why your candy drawer might start collecting dust.
What Makes a Healthier Snickers Alternative Actually Good
The first question you should ask about any homemade protein bar is whether it tastes like cardboard. I have thrown away entire batches of “healthy” treats that promised greatness but delivered chalk. The difference comes down to the quality of your main protein source. Grass-fed whey protein concentrate has a natural sweetness and milky richness that cheap isolates lack. Because the cows eat what they are meant to eat, the dairy carries more nutrients and a creamier mouthfeel. That matters when you are building a dessert-style bar.
The second factor is texture layering. A candy bar works because every bite gives you something different. Softness, crunch, chew, snap. Copying that structure with whole-food ingredients takes a little thought, but the payoff is enormous. You want a base that holds together without turning into rubber. You want a caramel layer that stays soft even when chilled. And you want a chocolate coating that shatters just slightly when you bite into it.
Skipping the junk additives is what ties everything together. No artificial sweeteners that leave a chemical aftertaste. No filler fibers that bloat your stomach. No hydrogenated oils that exist only to extend shelf life. Real protein does not need to dress itself up with nonsense. When you taste the finished bar, you recognize every single ingredient, and your body knows what to do with them.
Why This Is Worth Trying
Beyond the obvious pleasure of eating chocolate without a side of guilt, there are practical reasons to keep a batch of these bars in your fridge. They solve actual problems that busy humans face every day.
- Midday energy slumps that normally send you running to the vending machine disappear when you have real fuel within reach.
- Post-workout recovery feels more intentional when you are eating something you made yourself with high-quality protein.
- Late-night sweet cravings get answered immediately, so you are not standing in front of an open pantry eating stale cookies at eleven o’clock.
- Road trips, flights, and long errands become less of a food desert when you pack a couple bars.
- Kids who turn their noses up at “healthy snacks” suddenly become very interested when chocolate is involved.
The versatility also makes this worth your time. You can swap the nut butter, change the protein flavor, add different toppings, or adjust the sweetness level. One base method opens up dozens of variations, which means you never get bored.
Building the Layers
Think of this bar in three distinct parts. Each one is straightforward, but together they create magic. You do not need a blender, a food processor, or any special equipment. A mixing bowl, a spoon, and a small pan for melting chocolate will carry you through.
The Protein Base
The foundation needs to be firm enough to hold its shape but soft enough to bite through easily. Protein powder, a nut or seed butter, and a sticky liquid sweetener form the backbone. The grass-fed whey protein concentrate does the heavy lifting here. It mixes smoothly with minimal effort, absorbs moisture evenly, and sets up with a pleasant chew. Oat flour or finely ground oats give the base a subtle graininess that echoes the nougat texture in traditional candy bars. A pinch of salt wakes everything up.
The Peanut Butter Caramel
Real talk. This layer is dangerous. I have eaten it straight from the bowl with a spoon. You combine creamy peanut butter with a small amount of maple syrup or honey, a splash of vanilla, and maybe a tiny bit of coconut oil to keep it spreadable. Warm it gently until everything melds into a glossy, drippy caramel-like sauce. When it cools on top of the protein base, it sets into a fudgy layer that clings to your teeth in the best possible way. You can add chopped peanuts here for crunch or keep it smooth for a more classic texture.
The Dark Chocolate Shell
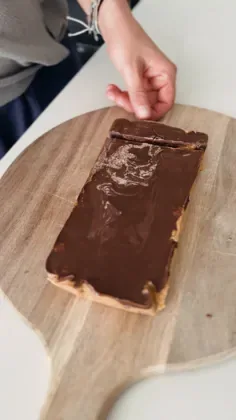
Do not skimp on the chocolate. Since there are only a handful of ingredients in this whole recipe, each one matters tremendously. Choose a dark chocolate bar or chips with a cocoa percentage you enjoy eating on its own. Melt it slowly with a small amount of coconut oil to help it set with a slight snap. The coating seals everything together, adds bitterness to balance the sweetness, and makes the bars look like they came from a fancy chocolate shop.
Tips for Bars That Hold Together Perfectly
Soggy bars that crumble when you lift them are a heartbreak. I have learned through trial and error what makes the difference between a bar that travels well and one that becomes a pile of crumbs in your lunch bag.
- Press the base layer firmly and evenly into your pan. Use the back of a measuring cup or a flat spatula to compact it with steady pressure.
- Chill each layer before adding the next one. Patience pays off here. A cold base layer supports the warm caramel without the two blending together.
- Cut the bars while cold but not frozen. A sharp chef’s knife run briefly under hot water and wiped dry makes clean, professional-looking slices.
- Store the finished bars in the refrigerator with parchment paper between layers. They stay fresh for up to a week, though mine rarely last three days.
- If you want to freeze them, wrap each bar individually in parchment and then place them in a sealed container. Thaw in the fridge overnight for the best texture.
The mixing process itself is remarkably simple. A bowl, a spoon, and about fifteen minutes of active time get you most of the way there. The chilling periods do the rest of the work while you go about your life. That ease matters when you are busy and tempted to grab something less nourishing.
Making the Flavor Your Own
Once you master the basic template, you can play. My kitchen experiments have yielded some combinations worth sharing. Almond butter instead of peanut butter gives a mellower, toastier caramel layer. Adding a teaspoon of espresso powder to the chocolate coating deepens the darkness and makes the whole bar taste more complex. A sprinkle of flaky sea salt on top before the chocolate sets turns each bite into something that feels intentionally gourmet.
For nut-free households, sunflower seed butter works surprisingly well in the caramel layer, and toasted pumpkin seeds scattered between the base and caramel add a satisfying crunch. The protein flavor you choose can also shift the personality of the bar. Vanilla keeps things classic. Chocolate protein doubles down on richness. An unflavored or lightly sweetened variety lets the other ingredients shine more brightly.
Texture variations keep things interesting too. A handful of crispy rice cereal folded into the base layer mimics the airiness of commercial candy bars. Toasted coconut flakes on top of the chocolate before it hardens add chew and a tropical note. Chopped dried cherries nestled into the caramel layer bring tartness that cuts through the richness beautifully.
Frequently Asked Questions
Can I use a different type of protein powder?
You can experiment with plant-based protein powders, but the texture and moisture absorption will differ significantly. Pea and rice protein blends tend to drink up more liquid, so you may need to increase the nut butter or add a splash of milk to keep the base from drying out. Whey protein concentrate remains the easiest option for a smooth, creamy result.
How do I melt chocolate without burning it?
Low and slow wins the race. Use a double boiler, or place a heatproof bowl over a pot of barely simmering water, making sure the bottom of the bowl does not touch the water. Stir frequently and remove the bowl from heat as soon as a few small lumps remain. The residual heat will finish melting them. Adding a teaspoon of coconut oil helps the chocolate flow and set with a slight gloss.
Are these bars safe for kids?
Yes, and children generally love them. The ingredients are whole, recognizable foods. If you are serving very young children, consider cutting the bars into smaller pieces to avoid choking on the chewy layers. Also check for any nut allergies before offering bars that contain peanut or almond butter.
Do these bars need to stay refrigerated?
The chocolate coating and caramel layer soften at room temperature, especially in warm kitchens. For the best texture and food safety, keep them in the fridge. They travel well for several hours in a lunch bag with an ice pack. On a cool day, they hold up nicely in a purse or backpack for a morning outing.
What if I do not have grass-fed whey protein?
Use the best quality whey protein you can find. The grass-fed, hormone-free label indicates higher standards of dairy sourcing, which does translate to cleaner flavor and better nutritional quality. Any real protein powder without artificial additives will work. Just aim for something with a short, honest ingredient list.
A Candy Bar That Pulls Double Duty
The first time I handed one of these to my husband, he looked at it suspiciously. He has endured many “healthy” desserts that left him reaching for the real thing twenty minutes later. He took a bite, paused, and said nothing for a solid ten seconds. Then he ate the rest of the bar in three bites and asked if there were more. That is the reaction you can expect when you balance good ingredients with smart technique.
What I love most about this healthier Snickers alternative is that it does not feel like a compromise. The chocolate is real. The caramel layer is sticky and salty and satisfying. The protein base keeps you full for hours instead of leaving you shaky and craving more sugar. You get to enjoy the ritual of unwrapping a little treat without undoing your goals for the day.
Taking twenty minutes to mix and layer and chill might seem like a luxury on a busy week. But consider it an investment in your future snack self. That version of you, the one who is tired and hungry and reaching for something comforting, deserves a beautiful homemade bar waiting in the fridge. Real ingredients, real satisfaction, and yes, better than a Snickers.