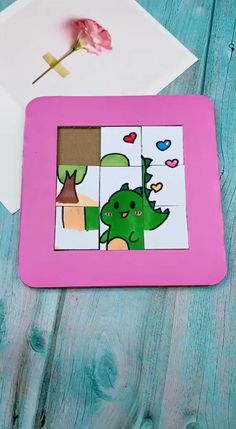
Looking for a simple and creative activity that keeps little hands busy and minds engaged? A DIY paper puzzle craft is the perfect solution. It combines art, logic, and a bit of patience, all with materials you likely already have at home. Whether you are a parent, teacher, or caregiver, this project offers a wonderful way to spend quality time with children while encouraging problem-solving and creativity.
This guide will walk you through everything you need to know to create your own paper puzzle from scratch. No special equipment is required, and the results are completely customizable. Let’s get started.
Why Make a Paper Puzzle?
Puzzles are more than just fun. They help develop important skills in children, such as spatial awareness, memory, and fine motor coordination. Making your own puzzle adds another layer of learning: planning, drawing, and cutting. Plus, it gives children a sense of pride in creating something they can play with afterward.
This DIY paper puzzle craft is especially great because it uses inexpensive materials. You do not need to buy a pre-made puzzle. Instead, you can turn a simple piece of paper into an engaging activity. It is also easy to adjust the difficulty by changing the size of the pieces or the complexity of the image.
Materials You Will Need
Before you begin, gather these basic supplies. Most are likely already in your home or classroom.
- A sheet of cardstock or thick paper (A4 or letter size works well)
- Markers, crayons, colored pencils, or paint for decorating
- A pencil and eraser for sketching
- Child-safe scissors
- A ruler (optional, for straight lines)
- An envelope or small box to store the puzzle pieces
If you want to make the puzzle more durable, you can also use thin cardboard, such as a cereal box. That adds a nice stiffness to the pieces.
Step-by-Step Tutorial: How to Make Your Own Puzzle
Follow these simple steps to create your own DIY paper puzzle craft. Let each child personalize their design.
Step 1: Choose Your Design
Decide what picture you want to turn into a puzzle. It could be a drawing of a favorite animal, a simple landscape, a rainbow, or even a family portrait. Keep the image large so it fills most of the paper. Avoid very small details that could be lost when cut into pieces.
Step 2: Draw and Color
Use your markers or crayons to create the design on the cardstock. Bright, bold colors work best because they make the puzzle pieces easier to identify. Take your time with this step. The more effort in the art, the more fun the puzzle will be.
Step 3: Outline Puzzle Pieces
Once the artwork is complete and dry, flip the paper over to the blank side. Lightly draw puzzle piece shapes with a pencil. Traditional puzzle pieces have interlocking tabs and blanks, but simple shapes like squares, rectangles, or wavy lines work perfectly. For younger children, larger pieces (about 6 to 8 pieces) are best. For older children, add more pieces (12 to 20) for a greater challenge.
Step 4: Cut Out the Pieces
Carefully cut along the lines you drew. If you made interlocking shapes, take it slowly around the curves. For straight or wavy lines, it goes faster. Always supervise young children with scissors. Once all pieces are cut, mix them up.
Step 5: Play and Store
Now the fun begins! Try to put the puzzle back together. Store the pieces in an envelope or a small container so they do not get lost. You can make several puzzles and swap them with friends or siblings.
Creative Variations to Try
The basic method above is just the start. Here are a few ways to change things up and keep the activity fresh.
- Photo puzzle: Print a family photo or a favorite cartoon character on paper and glue it onto cardboard. Cut it into pieces.
- Number or letter puzzle: Write numbers or letters on the blank side of the pieces. The child must assemble the puzzle correctly and then practice their letters or counting.
- Shape puzzle: Instead of interlocking pieces, cut the paper into simple geometric shapes (circles, triangles, squares) that form a picture when arranged correctly.
- Group puzzle: Have each child draw a small part of a large picture on a separate piece of paper. Combine all the pieces to create a giant puzzle.
Tips for Success
These practical tips will help your DIY puzzle turn out great every time.
- Use thick paper. Regular printer paper is too thin and tears easily. Cardstock or thin cardboard works much better.
- Keep pieces large for small hands. Smaller pieces can be frustrating for toddlers and preschoolers. Start with just 4 or 6 big pieces.
- Draw guide lines lightly. If you draw puzzle lines on the colored side, use a light hand so the lines do not distract from the picture.
- Laminate for long-lasting use. If you have access to laminating sheets, use them. Laminated puzzles can survive lots of play.
- Let kids lead the design. Allowing children to choose their own subject and colors makes the activity more meaningful and engaging.
Frequently Asked Questions
What is the best age for this craft?
This craft works for children ages 3 and up. Younger children will need help with cutting and can use larger pieces. Older children can design more complex puzzles with many small pieces.
Can I reuse the puzzle pieces?
Yes, as long as you store them carefully in a container. If the pieces get bent or torn, simply trace them onto new cardstock and cut them again. You can also laminate them for extra durability.
How do I make the puzzle harder?
To increase difficulty, add more pieces, make the pieces smaller, or create irregular shapes that are harder to match. You can also use a more detailed drawing where colors and lines are similar across several pieces.
Conclusion
Making your own DIY paper puzzle craft is a rewarding and budget-friendly activity that brings creativity and learning together. It turns a simple piece of paper into hours of entertainment and hands-on education. Children gain confidence as they draw, cut, and solve their own creations. Parents and teachers appreciate how easy it is to set up with items already at home.
This project also provides an excellent opportunity to talk about shapes, colors, and problem-solving in a fun, pressure-free way. Whether you use it for quiet time, a rainy afternoon, or a classroom break, a homemade puzzle never fails to bring smiles.
So grab some paper and markers, and start creating your own unique puzzle today. The best part is that no two puzzles will ever be the same. Every design is a reflection of the artist who made it. Enjoy the process and the playtime that follows.