Crafting with ordinary household items is one of the most rewarding ways to spend an afternoon. When you look closely at everyday objects, you begin to see hidden potential everywhere. Plastic bottles, simple fasteners, and tiny decorative elements can easily be transformed into wonderful little characters. Exploring the world of DIY bottle figures allows crafters of all skill levels to experiment with texture, shape, and storytelling using items they already own.
This type of imaginative project encourages resourcefulness. Instead of buying expensive specialty kits, you can dive into your junk drawer or recycling bin to find inspiring components. Whether you enjoy making whimsical creatures or minimalist sculptures, building these tiny companions offers endless entertainment. It is a fantastic way to unwind, spark your imagination, and produce something genuinely charming with your own two hands.
Gathering Simple Supplies for Your Project
Before diving into your creative session, it helps to collect your materials in one accessible workspace. The beauty of making DIY bottle figures lies in the simplicity of the components required. You do not need professional sculpting tools or high-end art supplies to achieve delightful results.
Here are some basic items to keep on hand:
- Clean, clear plastic bottles with secure caps
- Coated paperclips or small bendable wire in various colors
- Self-adhesive googly eyes in assorted sizes
- Clear water or alternative transparent liquids
- Tweezers or small pliers for precise bending
Keeping your workspace clean and well-lit will make the assembly process much smoother. Organizing your colorful clips and tiny accessories in small bowls also prevents them from rolling away while you work on your miniature characters.
Step-by-Step Guide to Shaping Your Figures
Creating miniature characters inside or alongside a container requires a bit of patience and steady hands. The main goal is to design compact shapes that fit comfortably through narrow openings while retaining a distinct, recognizable personality.
Follow these steps to build your own miniature art pieces:
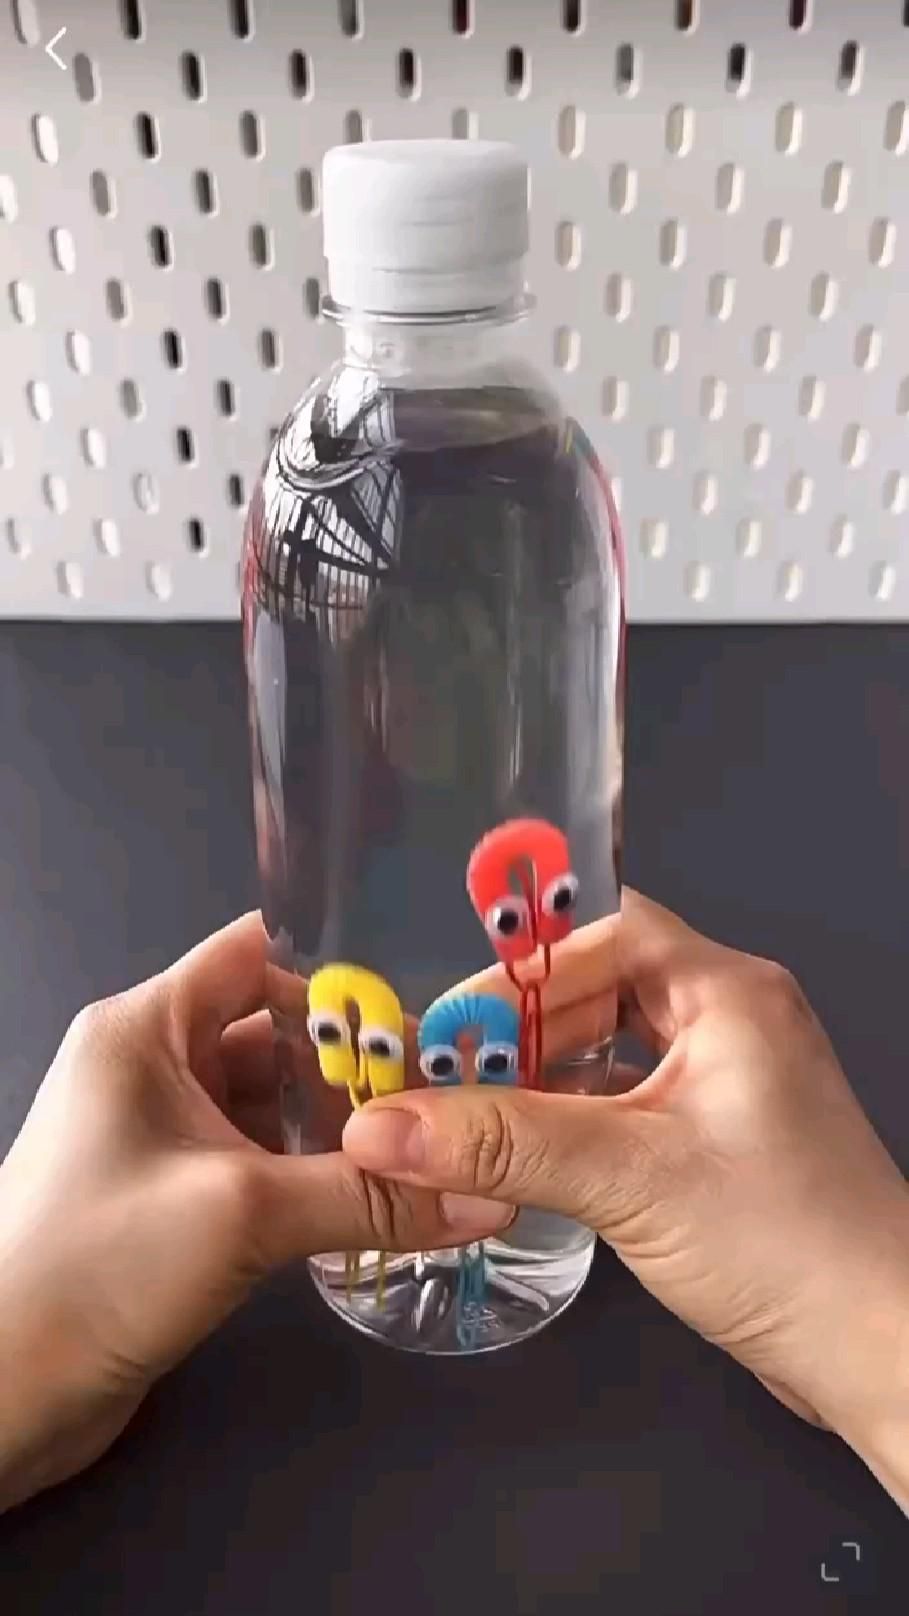
- Select your base materials, such as bright red, yellow, or blue coated paperclips, which offer both flexibility and vibrant color.
- Gently bend and twist the wire components into small, friendly shapes resembling stylized figures or abstract creatures.
- Attach tiny adhesive googly eyes to the upper portion of each bent wire shape to instantly give your creations character and expression.
- Fill a clean, transparent plastic bottle with fresh water, leaving a small air gap at the top before sealing the cap tightly.
- Drop your finished figures into the water-filled container or arrange them creatively around your workspace for a playful display.
Take your time during the bending phase. If a shape does not look quite right, simply readjust the wire until you achieve the desired silhouette. Experimenting with different heights and color combinations adds wonderful variety to your finished collection.
Creative Ways to Display and Customize Your Art
Once you have mastered the basics of constructing these tiny characters, you can experiment with presentation. The transparent nature of water-filled containers creates a mesmerizing magnification effect, making small details appear larger and more vibrant.
Consider placing your finished projects on a sunny windowsill where natural light can pass through the liquid, casting colorful reflections across your room. You can also group multiple containers together, each holding characters with distinct personalities, to create a lively narrative scene.
Customization is another great way to keep the craft engaging. Try using waterproof elements inside the liquid or adding non-toxic glitter for a shimmering background effect. Changing the colors of your wire components to match seasonal themes, such as autumn oranges and browns or winter blues and whites, ensures your handmade decor stays fresh all year round.
Troubleshooting Common Crafting Challenges
Every craft project comes with its own unique set of minor hurdles. If your wire shapes tend to lean or lose their form when placed inside a liquid medium, consider using thicker gauge wire or double-wrapping the core structure for extra stability.
Another common detail to monitor is water clarity. Always use fresh, clean tap water, and ensure your plastic containers are thoroughly rinsed and dried before final assembly. If you notice any condensation or residue on the inside walls, a quick wipe with a bottle brush will restore crystal-clear visibility.
Finally, make sure container caps are tightly secured, especially if the finished pieces will be handled frequently. Adding a small drop of waterproof adhesive around the threads of the cap can prevent accidental spills during enthusiastic creative sessions.
Conclusion
Embracing simple hands-on projects proves that creativity does not require complicated equipment. By transforming everyday objects into delightful DIY bottle figures, you unlock a fun and accessible way to express your artistic side. Whether you make a single colorful character or an entire underwater-themed collection, this enjoyable craft provides a wonderful outlet for imagination and relaxation.
Frequently Asked Questions
What kind of containers work best for this project?
Clear plastic beverage bottles with smooth surfaces work best because they offer an unobstructed view of the interior without distorting the shapes of your miniature figures.
Can I use regular metal paperclips instead of coated ones?
Coated paperclips are recommended because the plastic or vinyl coating prevents rust and adds bright, appealing colors to your miniature characters.
How do I keep the water clean over time?
Using distilled water and tightly sealing the cap helps prevent cloudiness and keeps your creative display looking fresh and clear for as long as you wish to keep it.