Table of Contents
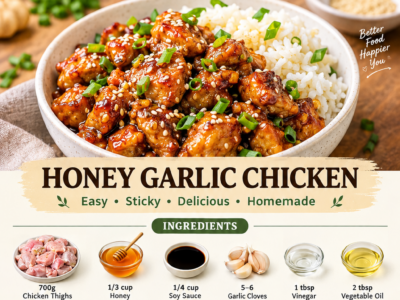
Crispy Honey Garlic Chicken Thighs are the weeknight dinner that tastes like a weekend project but takes almost no hands-on work. The thighs go onto a rack skin-side up in a hot oven so the fat renders and the skin turns glassy, then a honey-soy-garlic glaze goes on late so it caramelizes instead of burning.
The trick is timing: bake first, glaze second, broil last. That order gives you the two things people actually want from this dish, shatter-crisp skin and a glaze thick enough to coat the back of a spoon, without the sugar scorching before the meat is cooked through.
Serve it over rice, smashed potatoes, or a pile of greens, and spoon the pan sauce straight from the saucepan. It is a sheet-pan dinner that looks like you fussed, which is exactly the point.
Why You'll Love This Recipe
About the Ingredients
8 bone-in, skin-on chicken thighs (about 2 1/2 lb / 1.1 kg)
Choose thighs of even thickness so they finish at the same time; bone-in, skin-on is what gives you the crackly exterior. Boneless skinless thighs work too, but cut the second bake to 8 to 10 minutes.
1 1/2 tsp kosher salt
Kosher salt is coarser and seasons more evenly than table salt; if you only have fine sea salt, drop to 1 tsp. Salt the skin 10 minutes before baking so it draws out surface moisture.
1 tsp freshly ground black pepper
Fresh-cracked pepper blooms in the oven and tastes brighter than pre-ground. White pepper is a fine swap if you want the heat without black flecks on the skin.
1 tsp smoked paprika
Smoked paprika adds deep color and a faint campfire note that plays well with honey. Sweet paprika plus a pinch of chili powder is an easy substitute.
3 tbsp unsalted butter, melted
Butter carries the garlic and helps the glaze cling to the skin; melt it gently so it stays pale instead of browning. Ghee or olive oil works for a dairy-free version.
5 cloves garlic, finely minced
Use fresh garlic, not the jarred stuff, which turns bitter when it hits high heat; mince it finely so no chunk burns under the broiler. One heaping tablespoon of garlic paste is a solid shortcut.
1/3 cup honey
A light clover or wildflower honey browns predictably, while dark buckwheat honey scorches fast and tastes strong. Maple syrup can stand in for a vegan-friendly glaze.
2 tbsp soy sauce
Soy sauce brings the salt and umami that keep the glaze from tasting like candy. Use tamari for gluten-free or coconut aminos for a soy-free version.
1 tbsp apple cider vinegar
The acid cuts the sweetness and keeps the glaze glossy; rice vinegar or fresh lemon juice can replace it one for one. Do not skip it or the sauce tastes flat.
1/2 tsp red pepper flakes
Adjust up or down to taste; Aleppo pepper gives a gentler heat with more fruitiness. A small pinch of cayenne works if that is what you have.
1 tbsp cornstarch whisked with 1 tbsp cold water
This slurry turns the pan drippings into a spoonable, glossy sauce in about two minutes. Arrowroot or potato starch can be swapped 1:1, but add them off the heat.
2 tsp sesame seeds plus 2 sliced scallions, for garnish
Toast the sesame seeds 30 seconds in a dry skillet for a nuttier finish. Chives or thinly sliced shallot work if you have no scallions.
Tips & Tricks
Dry Skin Means Crispy Skin
Pat the thighs very dry with paper towels and let them sit uncovered at room temperature for 10 minutes before seasoning. Any moisture left on the skin steams into rubber instead of crisping.
Glaze Late, Never Early
Brush the honey mixture on only after the chicken has baked skin-side up for 20 minutes. Sugar applied at the start will burn black before the meat is cooked through.
Do Not Crowd the Rack
Leave a half inch between thighs so hot air can move around each piece. If your pan is small, bake in two batches or use a larger sheet pan rather than stacking the pieces.
Watch the Broiler Like a Hawk
The final broil takes 2 to 3 minutes and can go from golden to burnt in 30 seconds. Stay at the oven door with the light on and pull the pan the moment the skin turns deep amber.
Pro Tips
Step-by-Step Instructions
1. Heat the Oven
Set a rack in the upper-middle position and preheat to 425F (220C). Line a rimmed sheet pan with foil and set a wire rack inside it so the fat drips away from the chicken.
2. Dry and Season
Pat the thighs very dry with paper towels, front and back. Season both sides with the kosher salt and pepper, then sprinkle the smoked paprika over the skin side only.
3. Whisk the Glaze
In a small bowl, whisk the melted butter, honey, soy sauce, cider vinegar, minced garlic, and red pepper flakes until smooth and slightly thickened, about 30 seconds.
4. Bake Skin-Side Up
Arrange the thighs skin-side up on the rack, not touching, and bake 20 minutes at 425F (220C). The skin should look dry at the edges with a little fat pooled in the pan.
5. Brush and Glaze
Brush half the honey mixture generously over each thigh, then return to the oven for 10 to 12 minutes. The glaze should bubble at the pan edges and an instant-read thermometer near the bone should read 175F (79C).
6. Broil for Crackle
Switch the oven to broil and broil 2 to 3 minutes, watching constantly, until the skin is deep golden brown and audibly crackly. Pull the pan the second the glaze darkens at the corners.
7. Thicken the Sauce
Pour the reserved glaze into a small saucepan with the cornstarch slurry and simmer 2 minutes over medium heat. It is ready when it coats the back of a spoon and a line drawn through it holds.
8. Rest and Serve
Let the chicken rest 5 minutes, then spoon the warm sauce over the top and scatter with sesame seeds and sliced scallions. Serve with rice or roasted potatoes to catch the extra glaze.
Delicious Variations
Sticky Gochujang Version
Swap 1 tbsp of the soy sauce for gochujang and add 1 tsp toasted sesame oil to the glaze for a spicier, Korean-leaning dinner.
Lemon Herb Honey
Replace the smoked paprika with 1 tsp dried oregano and add the zest of one lemon to the glaze for a brighter, Mediterranean tilt.
Air Fryer Method
Cook the thighs at 400F (200C) for 22 minutes skin-side up, brush with glaze, then air fry 4 minutes more for a crisp finish without heating the whole oven.
How to Store Crispy Honey Garlic Chicken Thighs
Refrigerator
Store cooled chicken in an airtight container with the sauce spooned over it for up to 4 days. Keep the skin exposed rather than buried under other pieces so it does not turn soft.
Freezer
Freeze the thighs and sauce separately for up to 3 months; wrap each thigh tightly and freeze the sauce in a small jar. Thaw overnight in the refrigerator before reheating.
Reheating
Reheat uncovered on a sheet pan at 375F (190C) for 10 to 12 minutes so the skin re-crisps, then warm the sauce gently on the stovetop. The microwave works in a pinch but softens the skin.
Frequently Asked Questions
Q: Can I use chicken breasts instead of thighs?
Yes, but reduce the total bake time to about 20 minutes because breasts dry out faster. Use bone-in skin-on breasts, bake 15 minutes before glazing, then glaze and bake 5 to 7 minutes until the internal temperature reaches 165F (74C).
Q: Why did my honey garlic sauce stay thin?
The glaze needs a starch slurry and a real simmer to thicken. Whisk 1 tbsp cornstarch with 1 tbsp cold water, add it to the reserved sauce in a small saucepan, and simmer 2 minutes until it coats a spoon; adding starch to a cold or barely warm liquid will leave it gritty.
Q: How do I get the skin really crispy?
Dry the skin thoroughly, bake skin-side up on a wire rack, and finish under the broiler for 2 to 3 minutes. Moisture is the enemy, so do not cover the pan, do not baste with butter during the first bake, and never glaze until the skin has already started to render.
Q: Can I make this ahead for meal prep?
Yes, roast the thighs up to 3 days ahead and store them with the sauce separately. Reheat uncovered at 375F (190C) for 10 to 12 minutes to bring the skin back, which is far better than microwaving.
Q: Is this recipe gluten free?
Not as written, because soy sauce contains wheat. Swap in tamari or a gluten-free soy sauce and the rest of the ingredients are naturally gluten free.
If you make these Crispy Honey Garlic Chicken Thighs, snap a photo of that crackly skin and tell me how your family reacted. Save the recipe to your dinner board and come back to leave a rating, it helps other home cooks find a one-pan dinner that actually works on a Tuesday.
Crispy Honey Garlic Chicken Thighs – Easy One-Pan Dinner
Crispy Honey Garlic Chicken Thighs give you crackly skin and a sticky glaze in one pan, with 32g protein per serving and 15 minutes of prep time.
🧂 Ingredients
- 8 bone-in, skin-on chicken thighs (about 2 1/2 lb / 1.1 kg)
- 1 1/2 tsp kosher salt
- 1 tsp freshly ground black pepper
- 1 tsp smoked paprika
- 3 tbsp unsalted butter, melted
- 5 cloves garlic, finely minced
- 1/3 cup honey
- 2 tbsp soy sauce
- 1 tbsp apple cider vinegar
- 1/2 tsp red pepper flakes
- 1 tbsp cornstarch whisked with 1 tbsp cold water
- 2 tsp sesame seeds plus 2 sliced scallions, for garnish
📋 Instructions
- 1Heat the Oven — Set a rack in the upper-middle position and preheat to 425F (220C). Line a rimmed sheet pan with foil and set a wire rack inside it so the fat drips away from the chicken.
- 2Dry and Season — Pat the thighs very dry with paper towels, front and back. Season both sides with the kosher salt and pepper, then sprinkle the smoked paprika over the skin side only.
- 3Whisk the Glaze — In a small bowl, whisk the melted butter, honey, soy sauce, cider vinegar, minced garlic, and red pepper flakes until smooth and slightly thickened, about 30 seconds.
- 4Bake Skin-Side Up — Arrange the thighs skin-side up on the rack, not touching, and bake 20 minutes at 425F (220C). The skin should look dry at the edges with a little fat pooled in the pan.
- 5Brush and Glaze — Brush half the honey mixture generously over each thigh, then return to the oven for 10 to 12 minutes. The glaze should bubble at the pan edges and an instant-read thermometer near the bone should read 175F (79C).
- 6Broil for Crackle — Switch the oven to broil and broil 2 to 3 minutes, watching constantly, until the skin is deep golden brown and audibly crackly. Pull the pan the second the glaze darkens at the corners.
- 7Thicken the Sauce — Pour the reserved glaze into a small saucepan with the cornstarch slurry and simmer 2 minutes over medium heat. It is ready when it coats the back of a spoon and a line drawn through it holds.
- 8Rest and Serve — Let the chicken rest 5 minutes, then spoon the warm sauce over the top and scatter with sesame seeds and sliced scallions. Serve with rice or roasted potatoes to catch the extra glaze.